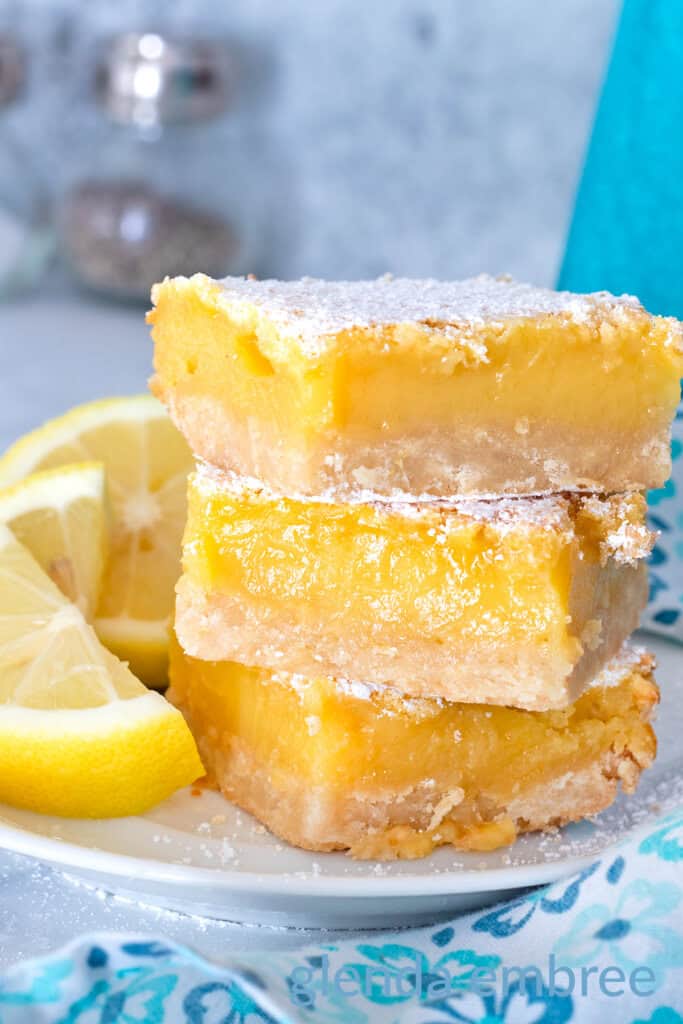
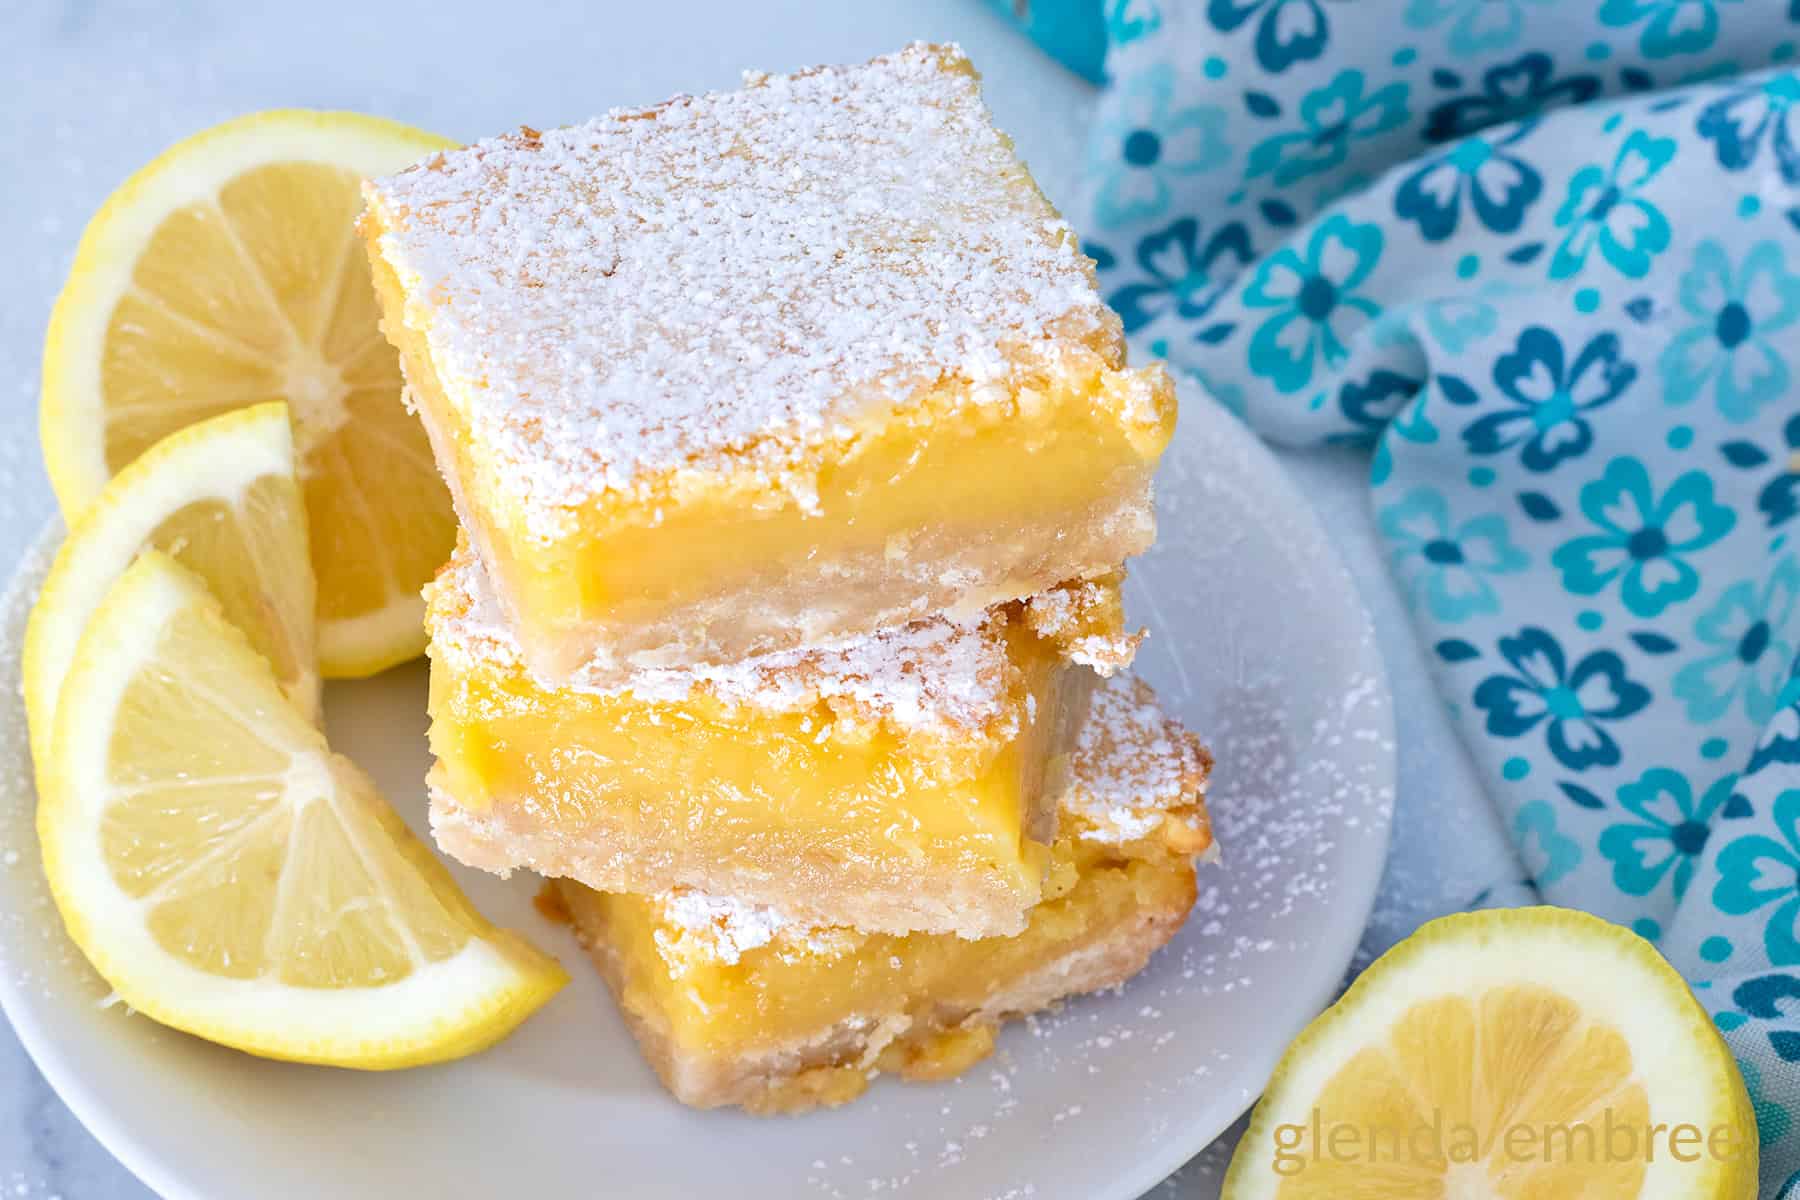
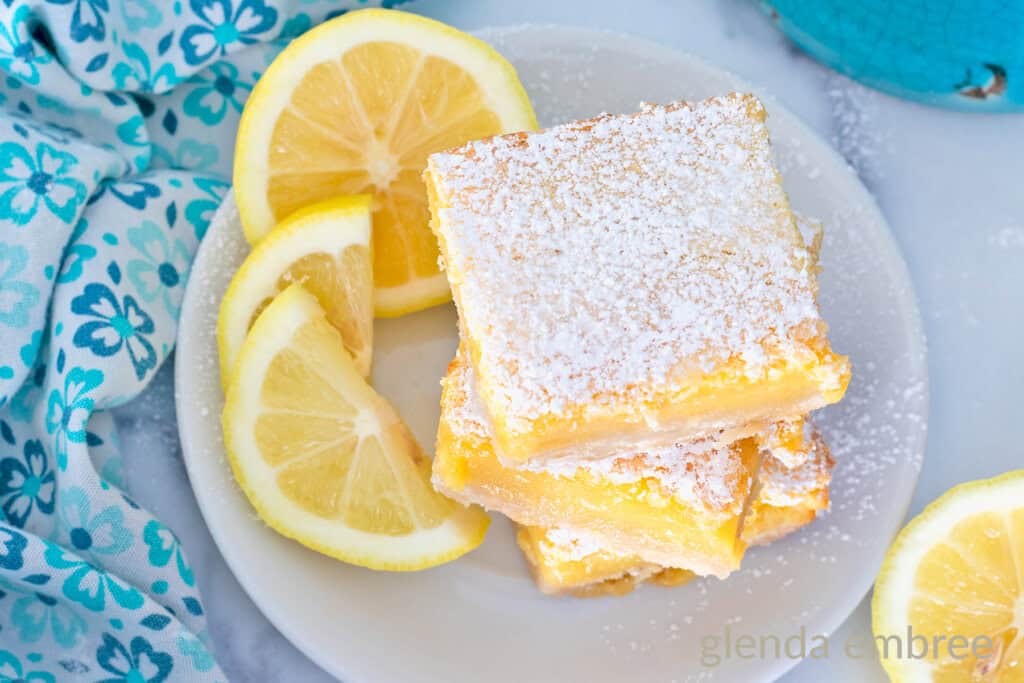
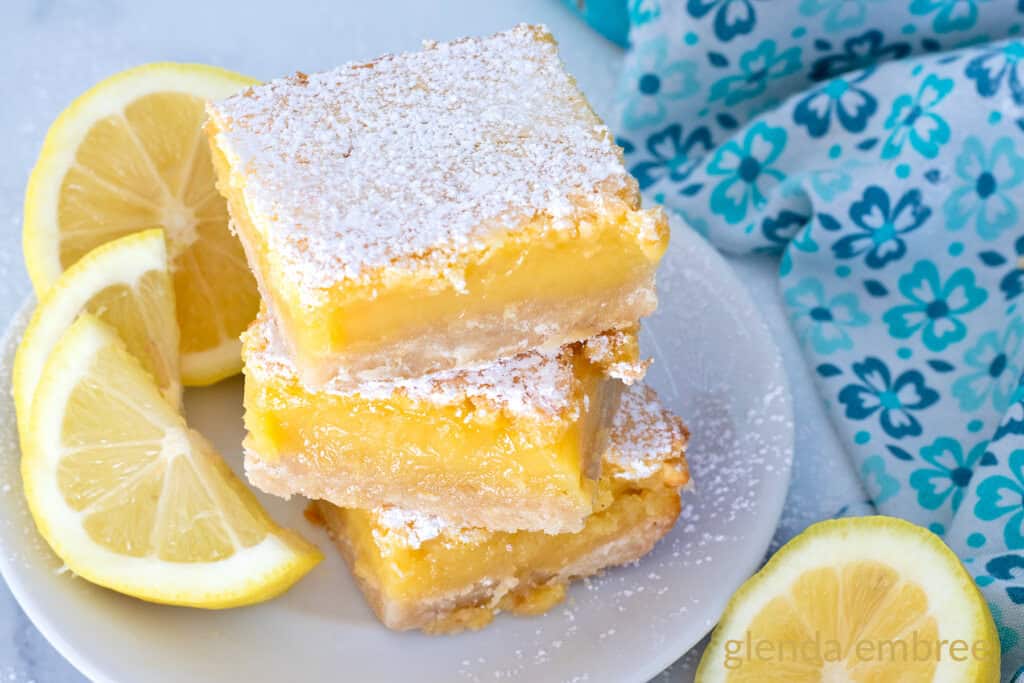
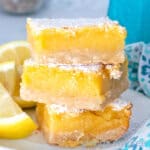
Lemon bars are tangy, zesty, citrus perfection with just enough sweetness to make them irresistible. The recipe is super easy. They’re like biting into sunshine. You’re gonna love them!
One of the first recipes we used to teach new bakers in 4-H was lemon bars. The simple buttery shortbread crust with luscious lemon filling was an easy success and built confidence while giving the kids lots of practice in basic baking skills.
The only difference between that recipe from years ago and this one is that I’m using fresh lemons. Adding lemon zest and freshly squeezed juice takes the flavor to new levels of lemony perfection.
Serve this easy lemon bars recipe anywhere, any time, for any occasion. They will disappear amongst rave reviews, and you’ll be a rock star!
The Ingredients
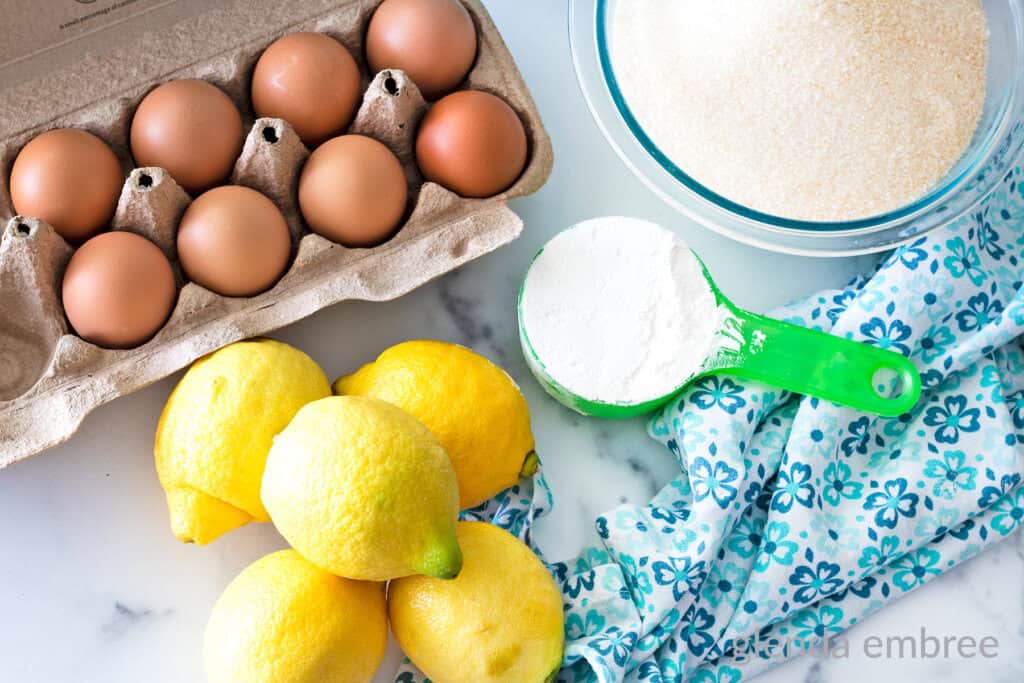
- All-Purpose Flour
- Powdered Sugar (Confectioner’s Sugar) – You’ll use this in the shortbread crust and for a light dusting over the finished bars. I use powdered sugar to make my outrageous orange shortbread cookies, too. It makes the texture delicate and crisp.
- Butter
- Vanilla – I always use my homemade vanilla extract but use what you have on hand.
- Lemons – You’ll be using both the zest and the juice.
- Granulated Sugar
- Eggs
FAQs & Tips for Success
What’s the best pan to use for lemon bars?
Some people are highly sensitive to the metallic taste that can be created by baking acidic ingredients in a metal cake pan. Others may not notice it, at all.
To ensure excellent results, bake your lemon bars in a glass or ceramic pan.
Do I have to line the pan?
If you only have metal baking pans, it’s a good idea to line the bottom and sides of your pan with parchment paper. This is just insurance for being sure you don’t get that metallic taste in your lemon bars. The acid in lemon juice can react with uncoated metal and create that off-putting taste, so better safe than sorry.
Parchment paper also makes it super simple to remove the bars from the pan. You can lift the whole batch from the pan and cut it much more easily on a cutting board than directly in the pan. lol We just cut directly in the pan for eating them at home.
Avoid aluminum foil for lining the pan for the same reasons as mentioned above.
Can I just use bottled lemon juice?
Of course. Years ago that’s exactly how I made lemon bars. However, you will not have the same level of fresh lemony flavor in your bars. And you’ll miss the additional flavor punch of the lemon sugar.
Bottled juices are usually made from concentrate and often contain additives. The flavor is not as intensely lemon as fresh.
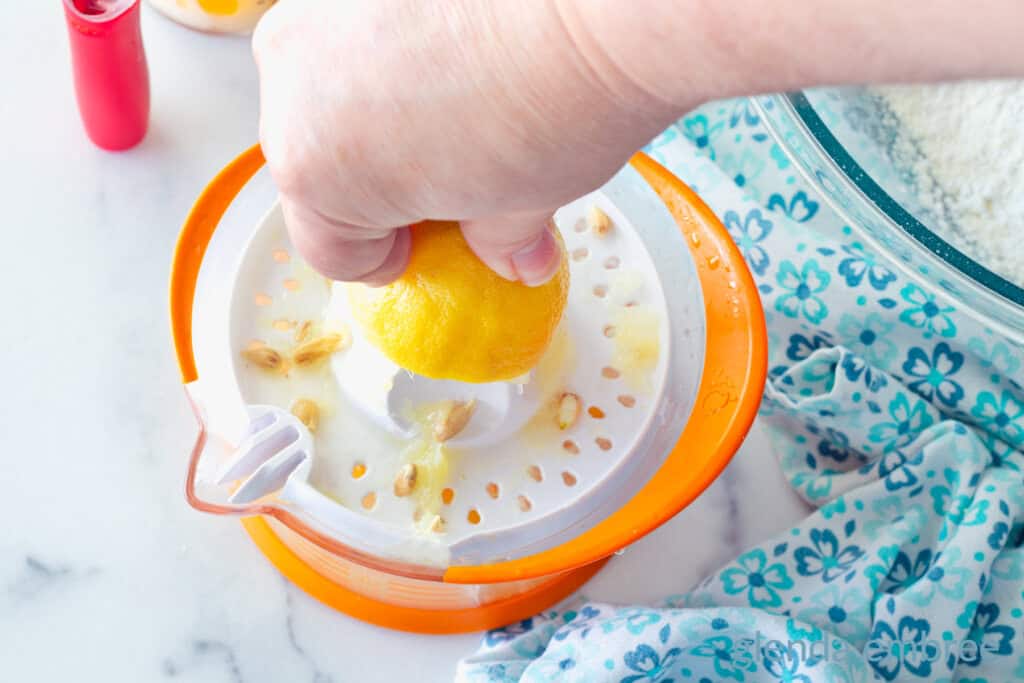
Juicing lemons is so easy nowadays, too. I love my little manual juicer. I’ve used it for so many years it’s not even available for sale any more.
But, it’s just like this one on Amazon [affiliate link]. I love the adjustable sizes for smaller and larger citrus and the attached measuring cup underneath. Seeds and pulp stay in the strainer tray and the juice runs into the cup. Easy peasy. Easy to clean and easy to store.
Poke some holes in the baked crust.
I learned a genius trick while researching lemon bars this week.
Sally over at Sally’s Baking Addition recommended using a fork to poke holes in the baked crust, before pouring the filling on top.
It works beautifully and helps the filling stay adhered to the crust after cooling. Such a great tip!
Don’t overbake your lemon bars.
Bake just until the center of your filling feels set.
Remember residual heat will continue baking the lemon bars for a few minutes after they’ve been removed from the oven.
What are the white air bubbles on top of my lemon bars?
Occasionally, you will notice tiny white air bubbles on top of your baked lemon bars. They’re very common and nothing to worry about.
It’s caused from the air bubbles in the whipped eggs rising to the surface of your lemon bars. Your lemon bars will taste exactly the same.
Once they’re cooled, dust the bars with the powdered sugar and no one will ever notice.
Can lemon bars be made ahead? How long will they keep?
Absolutely! Cool and chill your lemon bars according to the recipe. Cut into bars and then layer in a container with an airtight lid. Be sure to use parchment or wax paper in between the layers to prevent sticking.
The USDA guidance on lemon bars is to keep them in the fridge, sealed in an airtight container for up to seven days.
Lemon bars can also be frozen for up to three months.
Freezing Lemon Bars
You don’t need to dust the tops of lemon bars with powdered sugar when you plan to freeze them. It doesn’t hurt anything, but the sugar will dissolve into the bars in the freezer.
Flash-freeze individual bars on a tray or plate for about an hour. You want them fairly solid.
Wrap each individually frozen bar in wax paper or freezer paper now and place it in an airtight container. The extra wrap will protect the bars from freezer burn. Freeze for two to three months.
To thaw, remove just the number of lemon bars you need. Unwrap them and store them in a covered container in the fridge overnight or on the counter for about one hour.
Dust with powdered sugar just before serving.
Cutting the Bars
Keep a glass of hot water near where you’re cutting the bars. Use a straight-edged knife, not serrated.
Dip the knife in hot water and shake off any excess. Make the first cut.
Wipe the knife, dip it in hot water, again and make the next cut.
Repeat until the entire batch is cut.
When to Serve Lemon Bars
These lemony delicious dessert bars are perfect at any gathering or event. Think of using this simple recipe for Easter, Mother’s Day, graduation parties and on the Fourth of July.
Lemon Bars will be a welcome treat at potlucks and family reunions, backyard bbqs and on a busy weeknight.
They also make great lunchbox treats or “Welcome to the Neighborhood” plates for new neighbors.
These bright, lemony dessert bars are loved by young and old. They’re going to quickly become a go-to dessert recipe for any occasion.
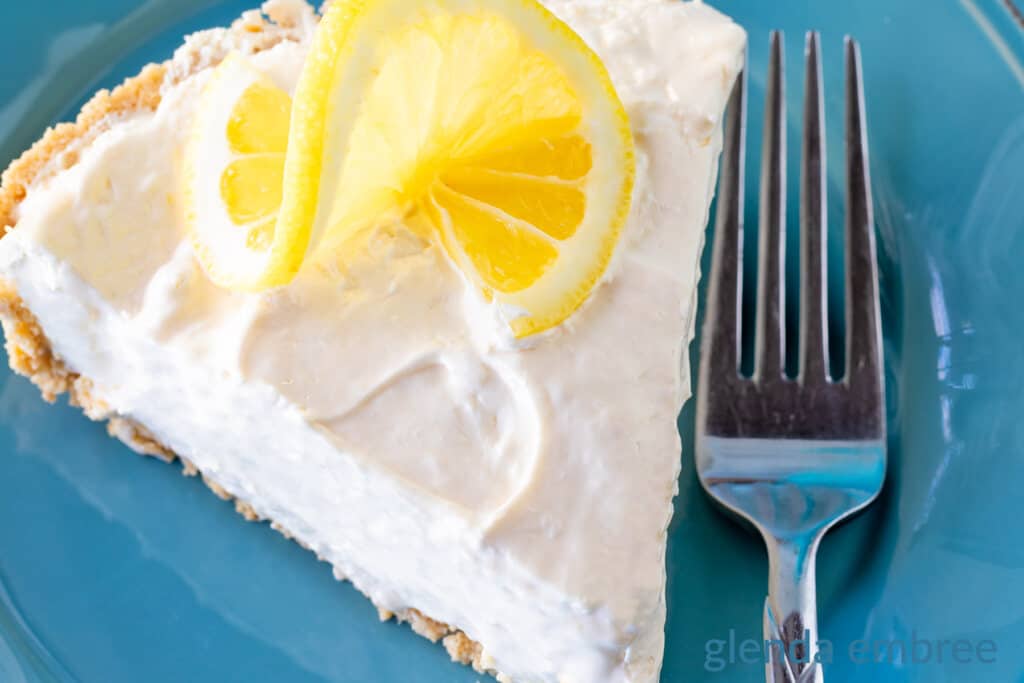
And if your family loves lemon desserts as much as mine does, you’ll want to check out this easy 5-ingredient Cream Cheese Lemonade Pie or my friend Christie’s Meyer Lemon Loaf, too.
How to Make Lemon Bars
- Preheat your oven to 325°.
- Grease and line a 9×13 baking pan. If your pan is metal, fully line it, bottom and sides with parchment paper. Lemon reacts with uncoated metal and can leave a metallic taste in your bars. For glass or ceramic baking pans, just grease the pan, although a sheet of parchment at the bottom of the pan will always make it easier to remove bars onto a cutting board for easy slicing.
- Zest 6 lemons. Save the zest for the filling.
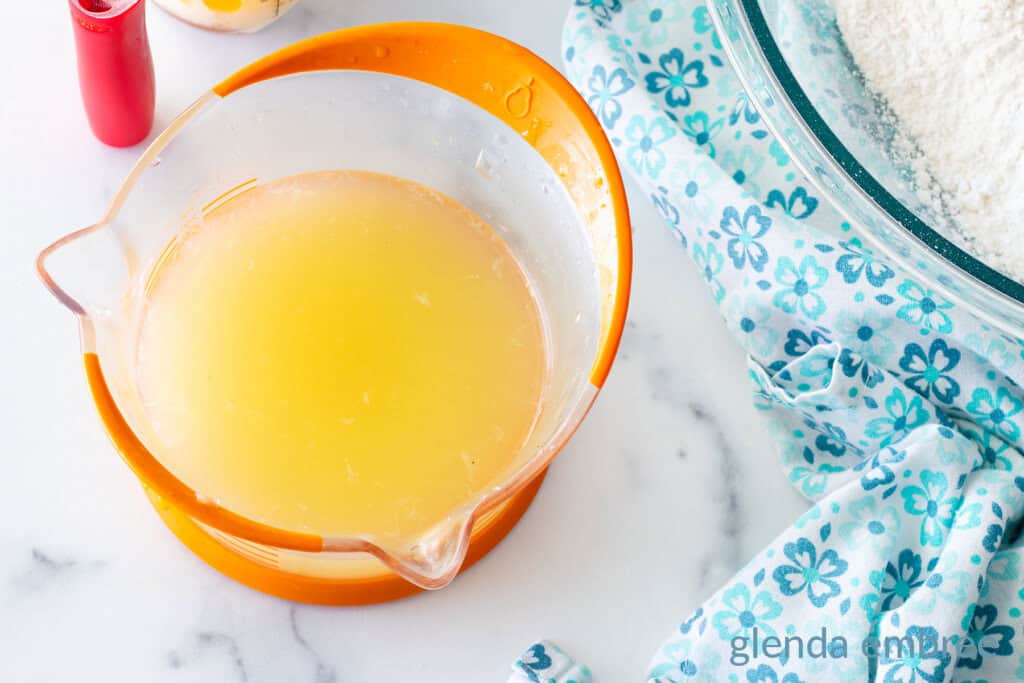
- Starting with your zested lemons, juice as many fresh lemons as it takes to get 1 full cup of fresh juice. My lemons had especially thick rinds this time, and I ended up using eight to get enough juice. Set the fresh juice aside for the filling.
- In a food processor or blender, add the granulated sugar and the saved zest of 6 lemons. Pulse multiple times to incorporate lemon zest throughout the sugar. This will make the pieces of zest smaller, as well as flavor and perfume the sugar. This is a smart kitchen hack I learned over at Preppy Kitchen. Set the scented sugar aside while you make the crust.
Make the Crust
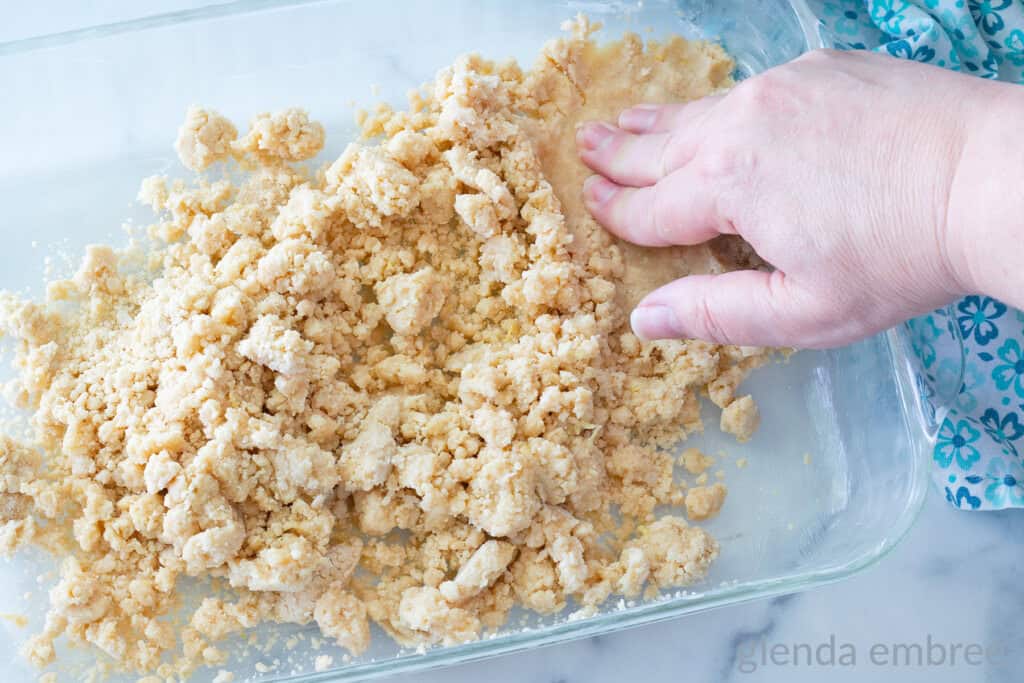
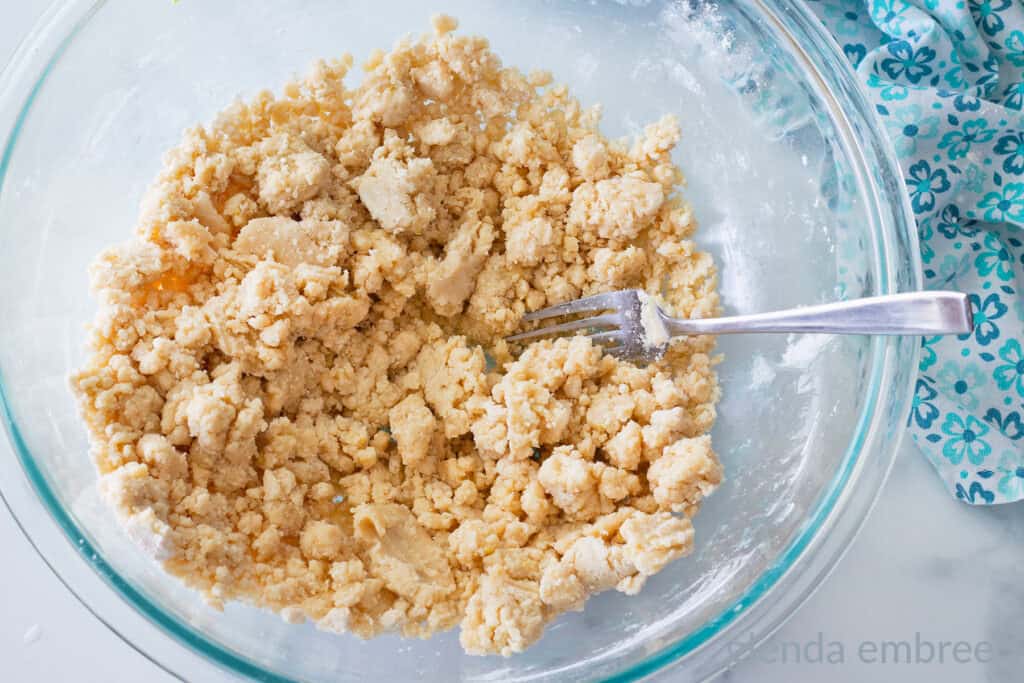
- In a mixing bowl, combine 2 1/2 cups flour, powdered sugar, vanilla and melted butter.
- Stir and combine just until no dry ingredients are visible in the bowl. The finished dough will be crumbly but moist and will form a ball if clenched in your fist. This shortbread cookie dough is similar to my Orange Shortbread Cookies but without cornstarch.
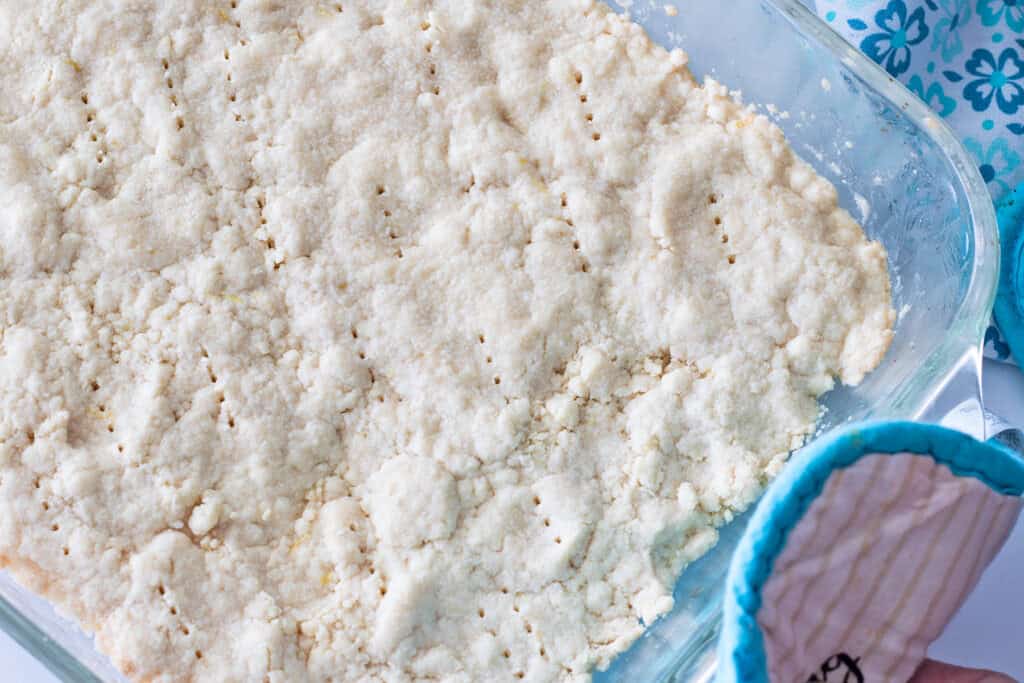
- Press the crust into the bottom of the prepared 9×13 pan. Use your fingers to spread the crust all the way to the edges in an even layer and gently press it together.
- Bake at 325° for 17-18 minutes until the edges are barely turning light brown.
Make the Filling
- Mix the filling while the crust bakes.
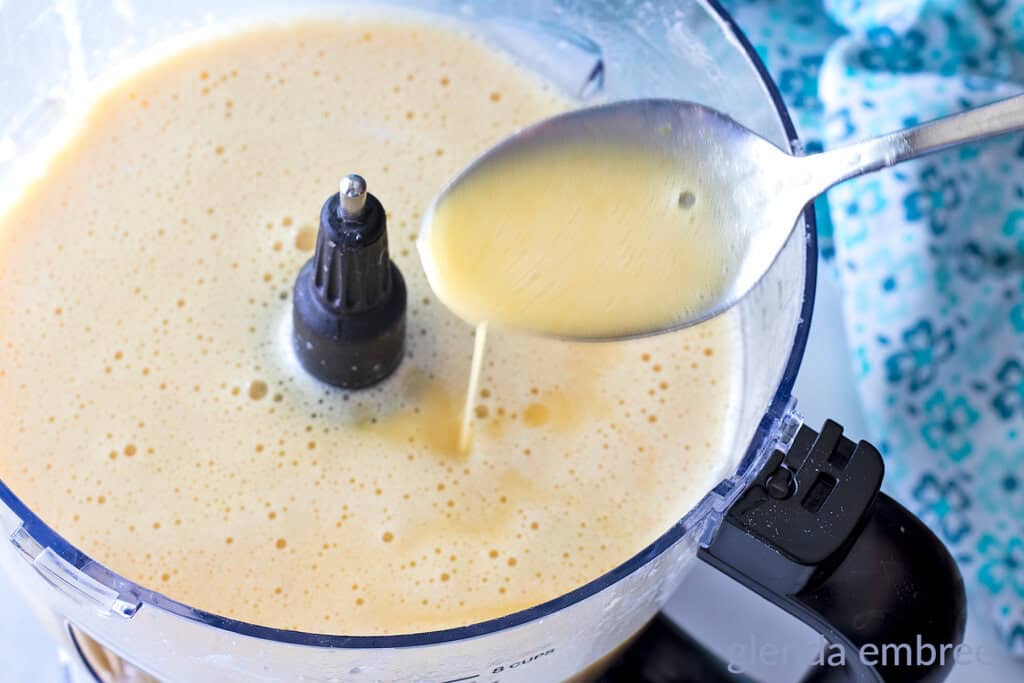
- Beat together the flavored sugar and 1/2 cup of flour in a mixing bowl with a hand mixer, in a stand mixer or in a food processor.
- Add the eggs and lemon juice and beat until fully combined and the sugar has begun to dissolve in the eggs and lemon juice. You should have a smooth, homogeneous mixture with all the ingredients fully incorporated and no sugar standing in the bottom of your bowl.
- As soon as you remove the crust from the oven, use a fork to poke holes around the surface. (I learned this trick over on the Sally’s Baking Addition blog. It’s genius for keeping the filling adhered to the crust.)
- Pour the filling over the warm crust as soon as you remove it from the oven.
- Place the lemon bars back in the oven and bake an additional 25 to 30 minutes or until the filling is just set in the center.
- Cool the bars in the pan on a wire rack until they reach room temperature.
- Refrigerate for at least 2 hours until cold and fully set.
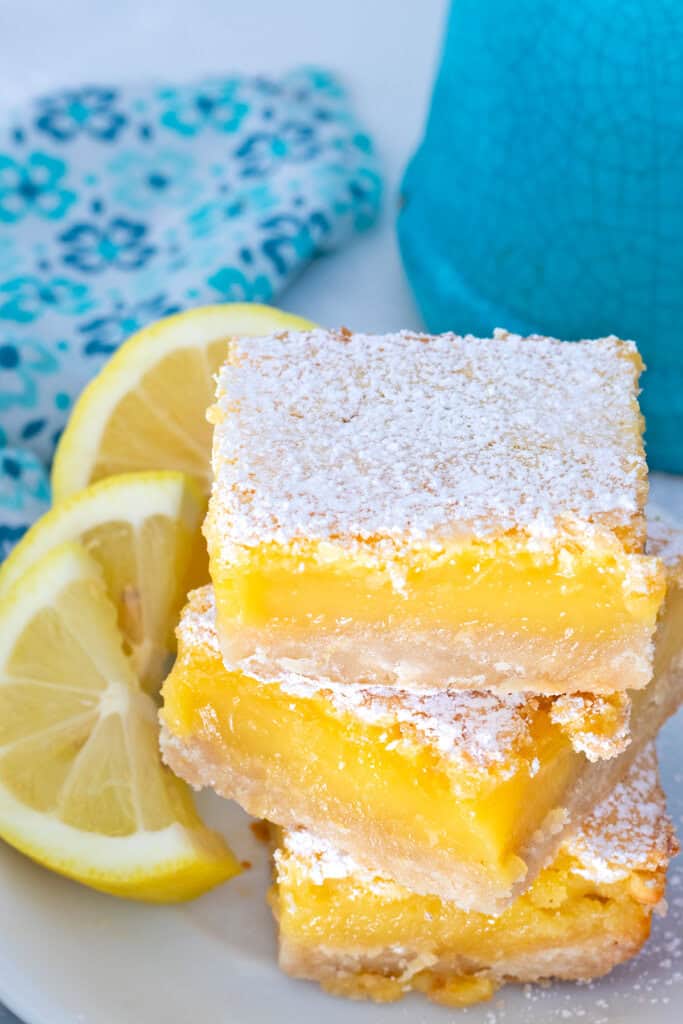
- Dust the tops of the lemon bars with a little extra confectioner’s sugar (powdered sugar) while they are still in the pan. I put a small amount of powdered sugar in a fine mesh strainer and gently shake it over the top of the full sheet of lemon bars.
- Cut into bars and serve. The yield will be determined by the bar size you cut. A 4×5 or 4×6 grid is good for smaller, more square bars, while a 4×4 grid is easier to cut and yields a reasonable dessert portion of 16 bars.
The Recipe
Want to Save This Recipe?
Enter your email & I’ll send you the link so you always have it at your fingertips. Plus, I’ll send a collection of easy recipes to your inbox every Friday!
By submitting this form, you consent to receive emails from Glenda Embree.
Lemon Bars
- Total Time: 1 hour
- Yield: 16 bars 1x
Description
My lemon bars recipe makes a dessert that’s bright, zesty and so delicious! The bars are thick, creamy lemon curd on a crisp shortbread crust. A perfect balance of tangy and sweet. Everyone loves these lemony bites of sunshine and they’re SO easy to make.
Ingredients
For the Shortbread Crust:
- 2 1/2 cups all-purpose flour
- 2/3 cup powdered sugar (confectioner’s sugar)
- 3/4 cup salted butter, melted
- 1 teaspoon vanilla extract
For the Lemon Filling:
- 6 to 9 lemons (Zest 6 of them. Juice enough to get 1 cup of fresh lemon juice.)
- 2 1/2 cups granulated sugar
- 1/2 cup flour
- 8 large eggs
Instructions
- Preheat your oven to 325°.
- Grease and line a 9×13 baking pan. If your pan is metal, fully line it, bottom and sides with parchment paper. Lemon reacts with uncoated metal and can leave a metallic taste in your bars. For glass or ceramic baking pans you should be fine to just grease the pan, although a sheet of parchment in the bottom of the pan will always make it easier to remove bars after baking.
- Zest 6 lemons.
- Starting with your zested lemons, juice as many fresh lemons as it takes to get 1 full cup of fresh juice. My lemons had especially thick rinds this time and I ended up using 8 to get enough juice. Set the fresh juice aside for the filling.
- In a food processor or blender, add the granulated sugar and the saved zest of 6 lemons. Pulse multiple times to incorporate lemon zest throughout the sugar. This will make the pieces of zest smaller, as well as flavor and perfume the sugar. Set the scented sugar aside while you make the crust.
Make the crust:
- In a mixing bowl, combine 2 1/2 cups flour, powdered sugar, vanilla and melted butter.
- Stir and combine just until no dry ingredients are visible in the bowl. The finished dough will be crumbly but moist and will form a ball if clenched in your fist. This shortbread cookie dough is similar to my Orange Shortbread Cookies but without cornstarch.
- Press the crust into the bottom of the prepared 9×13 pan. Use your fingers to spread the crust all the way to the edges in an even layer and gently press it together.
- Bake at 325° for 17-18 minutes until the edges are barely turning light brown.
- Mix the filling while the crust bakes.
Make the Filling:
- Beat together the flavored sugar and flour in a mixing bowl with a hand mixer, in a stand mixer or in your food processor.
- Add the eggs and lemon juice and beat until fully combined and the sugar has begun to dissolve in the eggs and lemon juice. You should have a smooth, homogeneous mixture with all the ingredients fully incorporated and no sugar standing in the bottom of your bowl.
- As soon as you remove the crust from the oven, use a fork to poke holes around the surface.
- Pour the filling over the warm crust as soon as you remove it from the oven.
- Place the lemon bars back in the oven and bake an additional 25 to 30 minutes or until the filling is just set in the center.
- Cool the bars in the pan on a wire rack until they reach room temperature.
- Refrigerate for at least 2 hours until cold and fully set.
- Dust the tops of the lemon bars with a little extra confectioner’s sugar (powdered sugar) while they are still in the pan. I put a small amount of powdered sugar in a fine mesh strainer and gently shake it over the top of the full sheet of lemon bars.
- Cut into bars and serve. The yield will be determined by the bar size you cut. A 4×5 or 4×6 grid is good for smaller, more square bars, while a 4×4 grid is easier to cut and yields a reasonable dessert portion of 16 bars.
Notes
Store cut bars in an airtight container in the fridge for up to 7 days.
Freeze for up to 3 months. Read post for full instructions to freeze lemon bars.
- Prep Time: 15 min
- Cook Time: 45 min
- Category: Dessert
- Method: Baking
- Cuisine: American
More Dessert Recipes You’ll Love


")
")


About Glenda
I believe cooking from scratch doesn’t have to be complicated and that YOU can do it. My simple recipes, tutorials, and cooking tips will help you get weeknight dinners on the table with less stress. Forget takeout or the drive-thru. Let me show you how to make homemade easy. Read more...


Has anyone tried this recipe with gluten free flour? My husband loves lemon bars but can’t have wheat.
Carol, I have not, but my guess is that if you choose a blend with xanthan gum it should probably be fine.
These are the very best lemon bars I’ve ever made or eaten! Thank you for sharing this wonderful recipe.
Pamela, you’ve made my day! I’m so glad you’re enjoying them.