Something magical happens when you take a beloved classic dessert and serve it in individual portions. Banana Pudding Cups are a delicious sweet treat that everybody loves. And these are SO easy!

Mini banana pudding cups are everything you love about the classic banana pudding recipe.
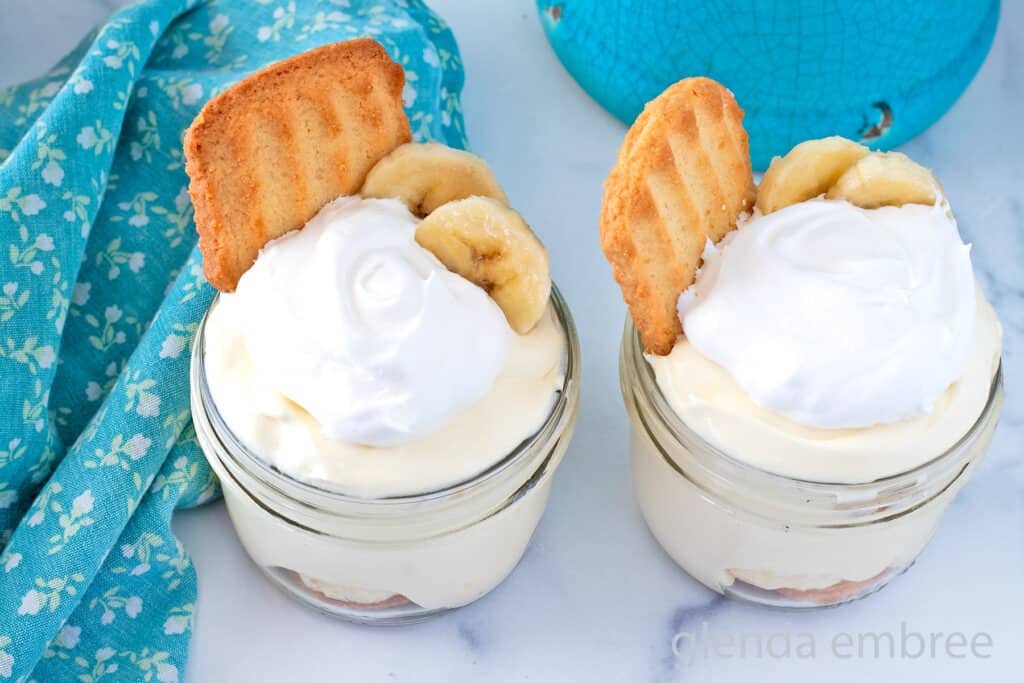
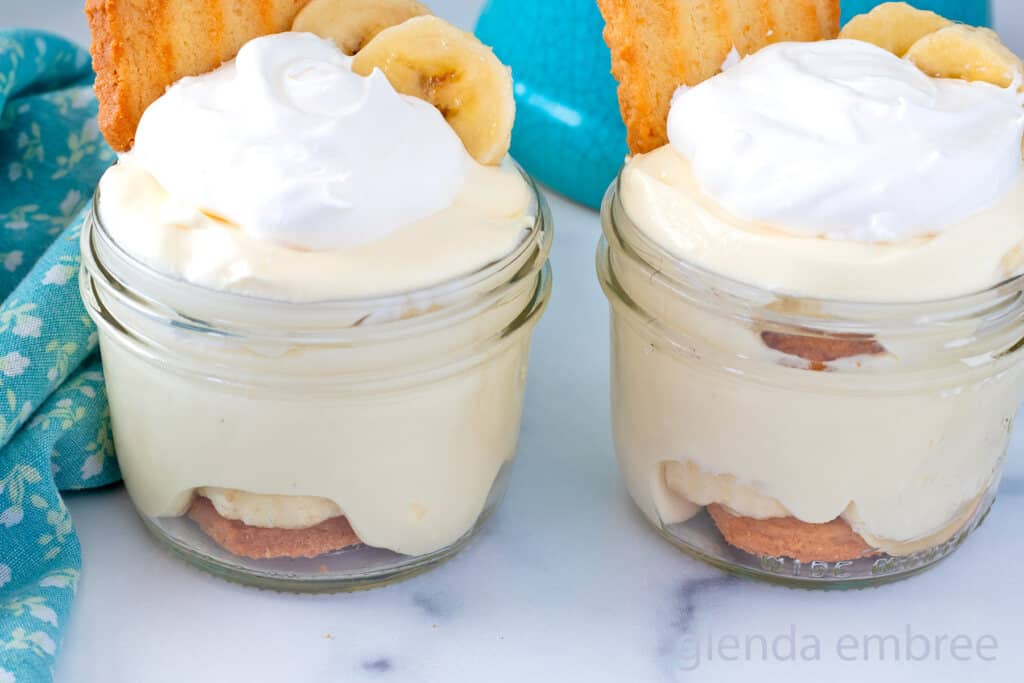
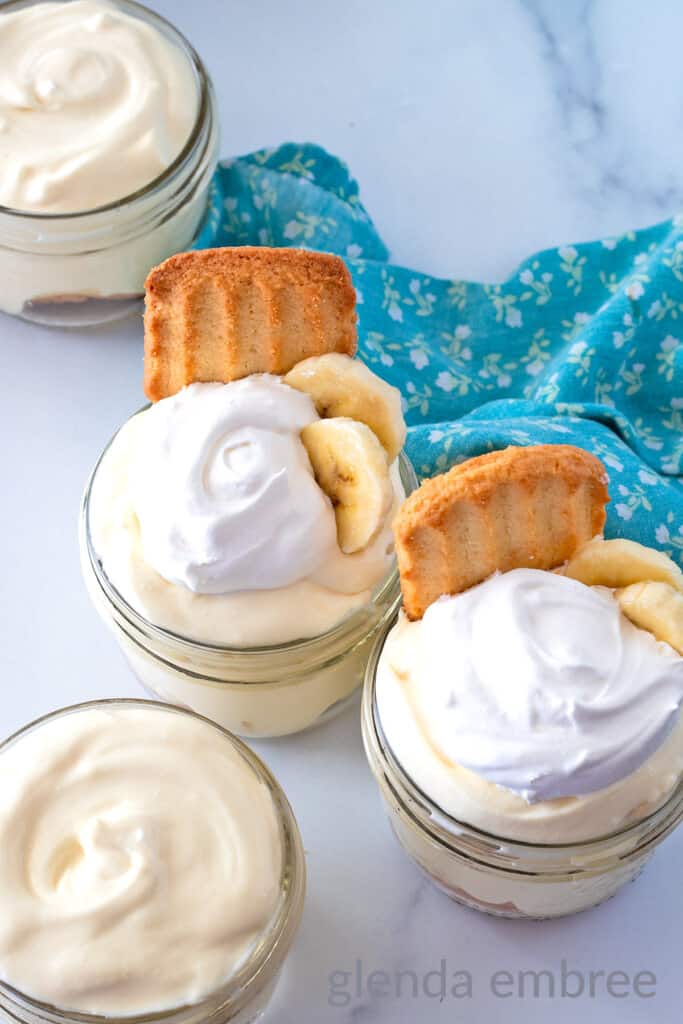
The crunchy cookies layered with sliced bananas, creamy pudding and whipped cream make a perfect dessert for almost any meal.
My banana pudding cups recipe puts my own spin on the dessert you remember, but it’s so close to the classic you’re still going to love it.
What’s different? Only the cookies. I’ve never been a fan of the traditional Nilla Wafers. So, I subbed in a favorite shortbread. This recipe for making individual banana pudding cups will work whichever cookie you decide to use.
Banana pudding dessert cups are easy to transport, so they’re great for potlucks and picnics. When you’re serving large groups at graduations or family reunions, the pre-made desserts are easy to prep, easy to serve and easy to carry around at a party.
Serve fun and delicious banana pudding cups at any gathering or family dinner, and they’re bound to be an instant hit.
The Ingredients
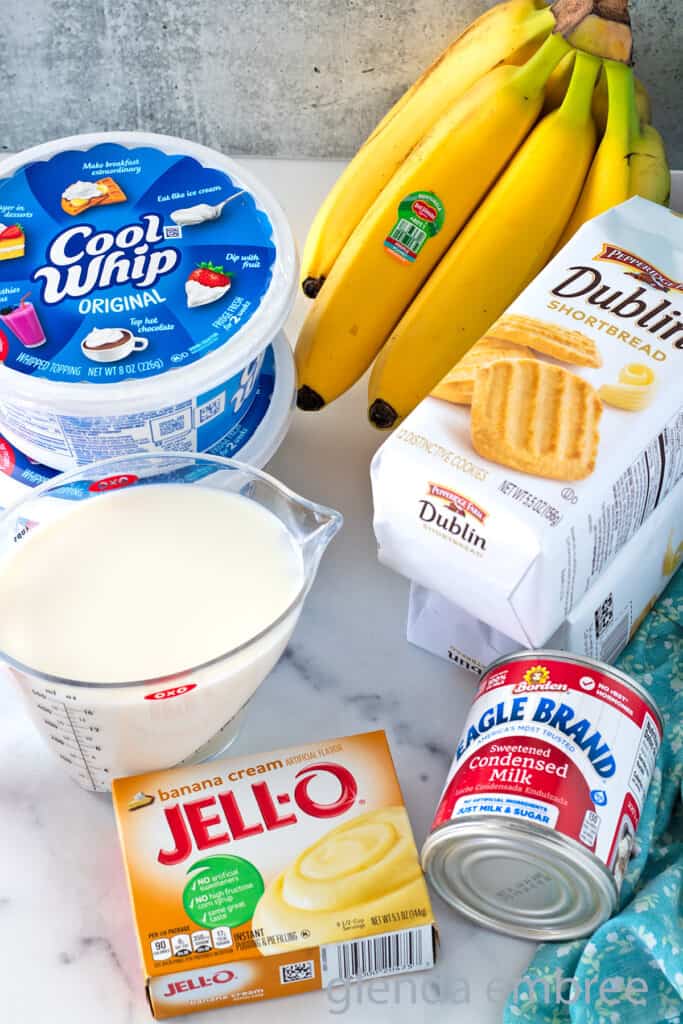
- Banana Instant Pudding Mix
- Condensed Milk
- Whole Milk
- Homemade Vanilla Extract
- Fresh Bananas
- Shortbread Cookies
- Non-Dairy Whipped Topping (Cool Whip)
FAQs
Banana slices can be tossed in a small amount of lemon juice to help prevent browning. In the case of banana pudding mini cups, however, you may not want to add the lemon flavor. Instead, choose bananas that are firm and just newly ripe. Overly ripe bananas will be soft and will brown more quickly. Also, be sure to seal the air from contacting the banana slices in the banana pudding recipe by spreading the pudding mixture all the way to the edge of each cup or jar. Don’t leave any way for air to come in contact with the banana slices.
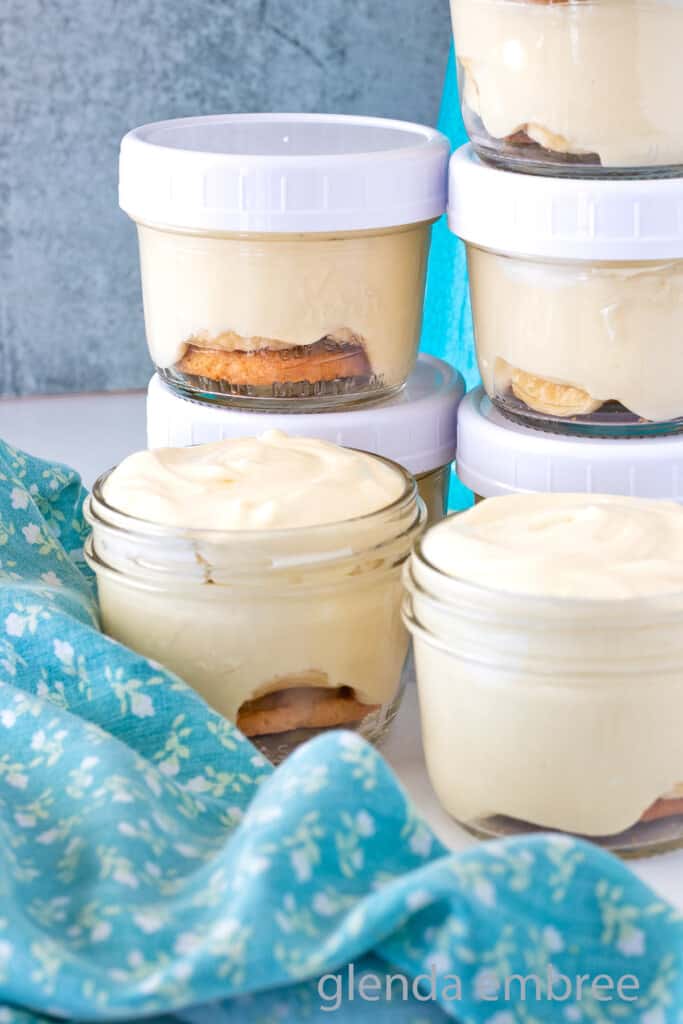
Yes. If you are making your banana pudding in jars that can be sealed, the banana pudding cups can be made up to 48 hours in advance. My banana dessert cups actually lasted four days in the refrigerator without any significant browning of the bananas. They were tightly sealed in the jars and the pudding was sealing the banana layers from air contact. I removed the lids and added the decorative topping as I was ready to serve them.
Why You’ll Love Serving Banana Pudding Cups
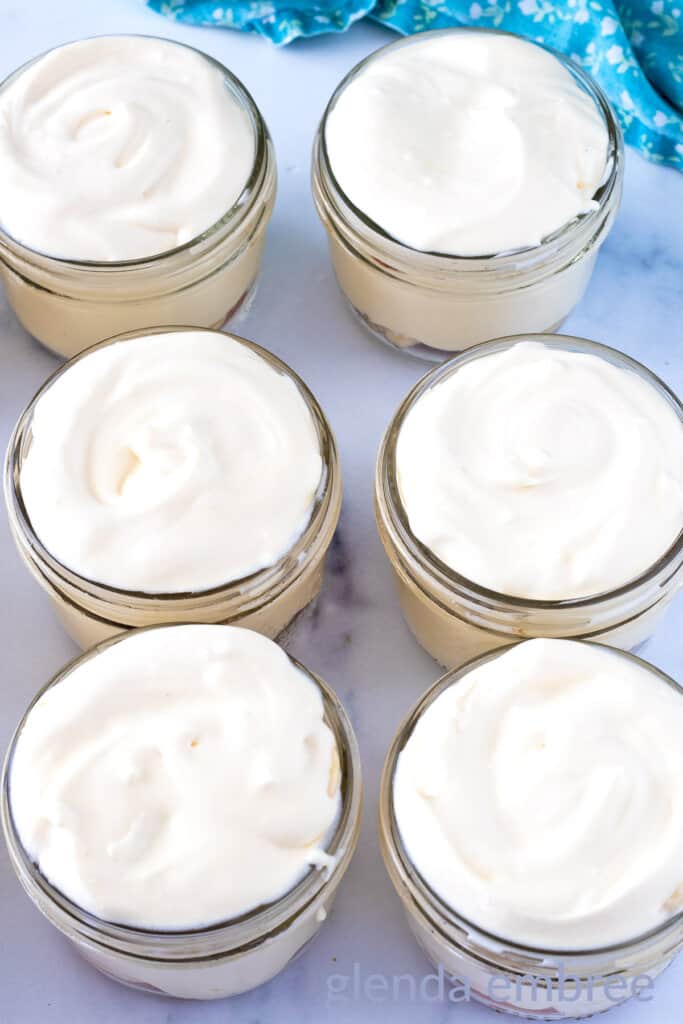
Everyone loves individual desserts. They’re just fun, and something about them seems so special. This easy banana pudding recipe in mason jars or individual cups is no exception. They’re absolutely delicious and so attractive on a dessert table.
The simplicity of ingredients and preparation makes this the best banana pudding recipe for me. The pudding whisks together in minutes, and the cups’ assembly takes only minutes, as well. That makes these banana pudding cups any party host’s dream for a simple and memorably delicious dessert option.
My recipe makes nine or ten preportioned banana pudding cups, depending on the size of your containers. Making them in half-pint (one cup) wide-mouth canning jars, I got nine pudding cups and had about three tablespoons of pudding mixture left over. So it’s easy to serve a luscious dessert to a large group with very little effort.
Tips for Recipe Success
- Choose the best container. Use wide-mouth cups or jars, which are easy to fill and eat from. If you are making your banana puddings ahead of time, be sure the jars or cups you choose have air-tight covers. I love the half-pint wide-mouth jars from Kerr [affiliate link].
- Protect your banana slices. Be sure your banana layers are fully sealed with pudding mixture right to the edge of the jar. It also helps to use bananas that are just ripe. Overripe bananas will brown much more quickly.
- Choose the right cookie. If making the dessert jars ahead of time, use a cookie that will hold up to the moisture of the bananas and pudding over the time they’ll be stored. Nilla Wafers are not a good choice for storing for more than a few hours, in my opinion. They get too soft and even soggy. That texture is a matter of personal preference, but I prefer the Dublin shortbread cookies. They stay firmer and still have a pleasant cookie texture after two to three days in the fridge. I purchase them at Walmart in the cookie aisle.
- Leave time for the dessert to set fully. Allow enough time for your banana pudding dessert cups to set in the fridge. The pudding will be soft set and ready to serve almost immediately, but for the best banana pudding cup texture, give this dessert at least an hour in the fridge.
- Choose the right pudding mix. If you have trouble finding banana instant pudding mix, you can use vanilla instant pudding mix instead. Preparing homemade banana pudding cups as quickly as this recipe intends requires the use of instant pudding mix. The cook-and-serve style of pudding takes longer to prepare, cool and set.

Possible Variations
We’ve already discussed switching up the cookies in this recipe. Vanilla Wafers are traditional. I prefer the firmer, crisper texture of the Dublin shortbread cookies. Use your favorite.
You can also choose a cook and serve pudding mix. Others prefer to use their favorite homemade vanilla pudding recipe. Both will work, but require more preparation and cooling time than my easy banana pudding cup recipe. The homemade pudding yield may also vary from the instant pudding yield, so you will need to adjust quantities accordingly.
Homemade whipped cream made from heavy whipping cream, powdered sugar and a bit of cornstarch to stabilize it could be used in the recipe in place of Cool Whip. Stabilizing it will buy you a bit of time, but I would not expect to be able to prepare your pudding cups more than a few hours ahead if using homemade whipped cream.
What to Serve with Mini Banana Pudding Cups
Easy banana pudding in jars or cups would be a great way to finish almost any meal. It’s not a heavy dessert and being pre-portioned, it’s the perfect size for a sweet finish without overindulging. We love it any time of year and for any celebration where we’re gathering with family and friends.
Banana Pudding Cups are a great finish to any of the meals below.
How to Make Banana Pudding Cups
Make the Pudding

- Organize your jars or cups into an assembly line workstation, and then start your pudding.
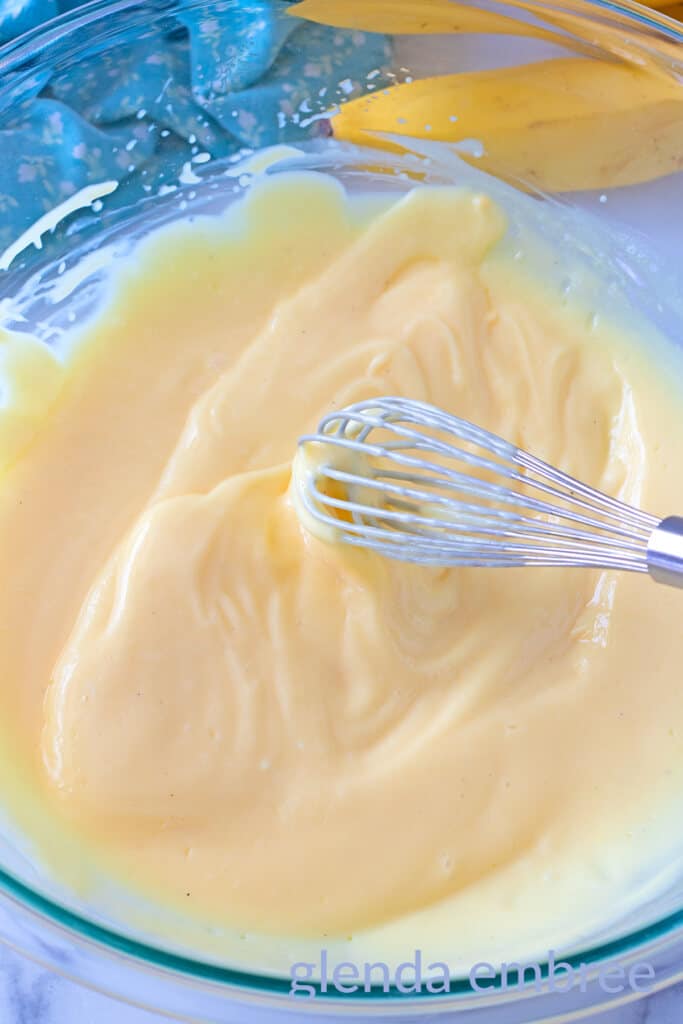
- Pour the banana pudding mix, cold milk and vanilla extract in a large mixing bowl and whisk until thoroughly combined and thickened.
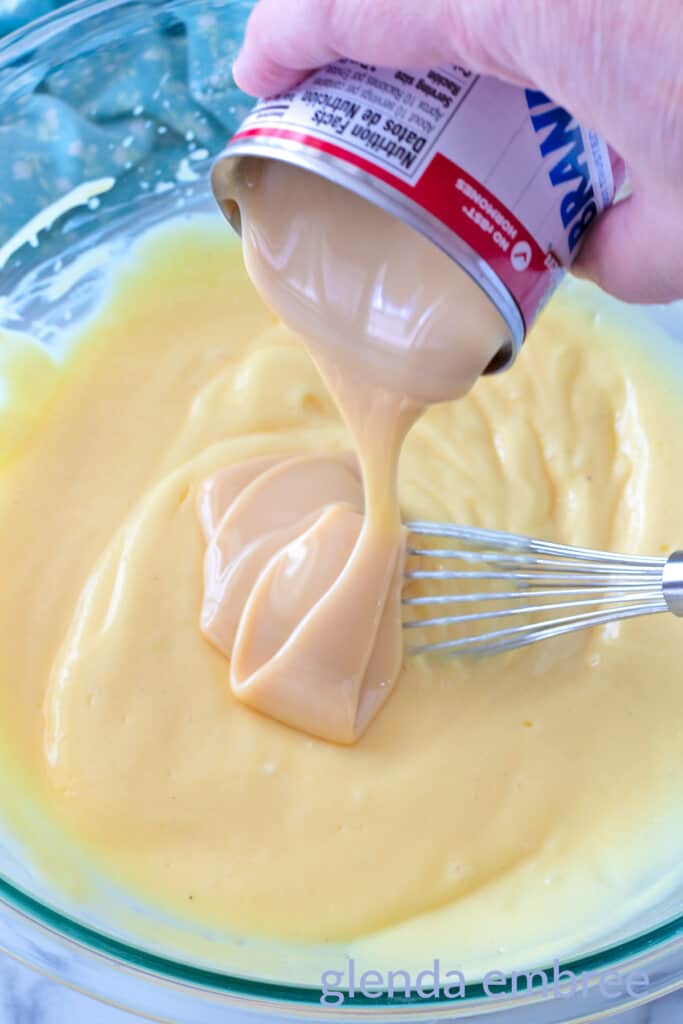
- Whisk in the sweetened condensed milk.
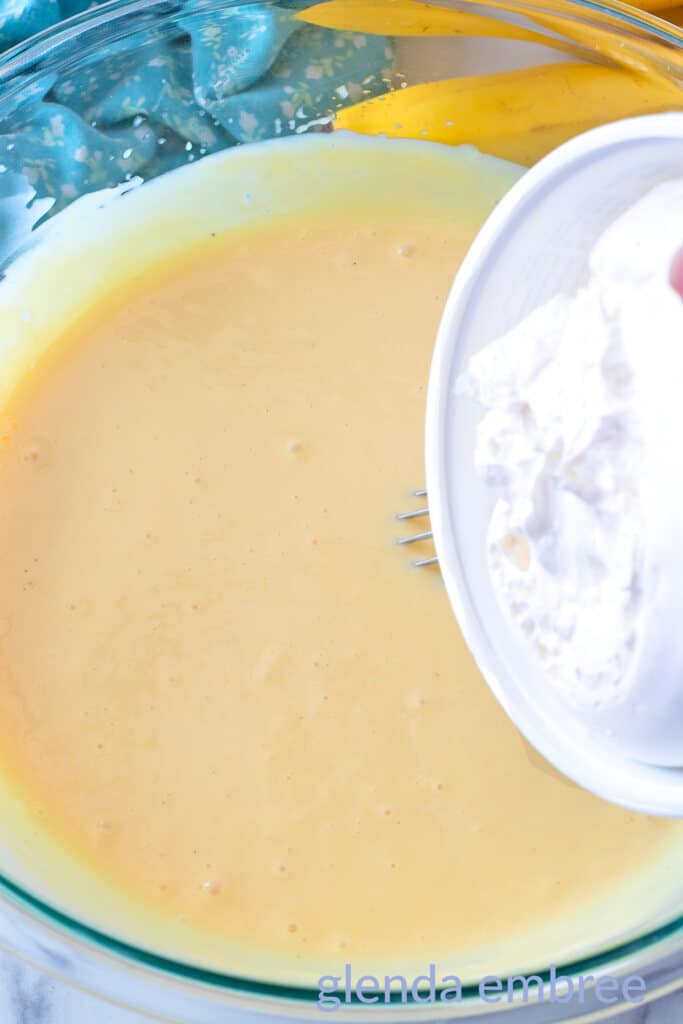
- Dump one tub of Cool Whip into the pudding mixture. Fold it together until fully combined. Save the second tub of Cool Whip for layering and decorating the top. You’ll have some left over at the end.
- Slice the bananas into 1/4-inch thick rounds.
- Take the cookies, pudding and remaining Cool Whip to the assembly line workstation you created.
Assemble the Banana Pudding Cups
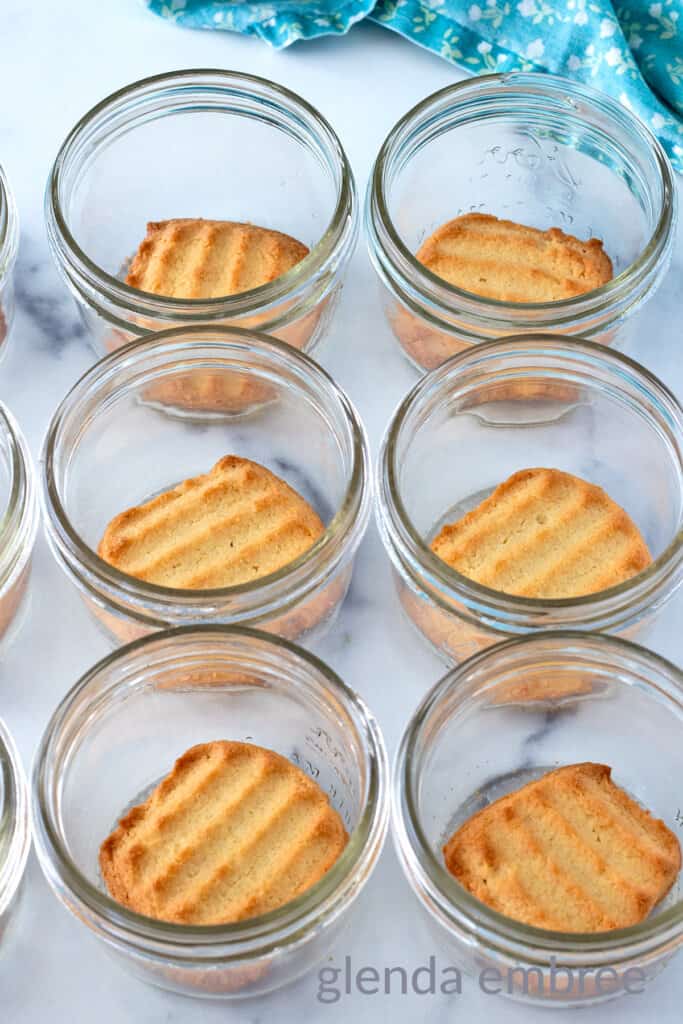
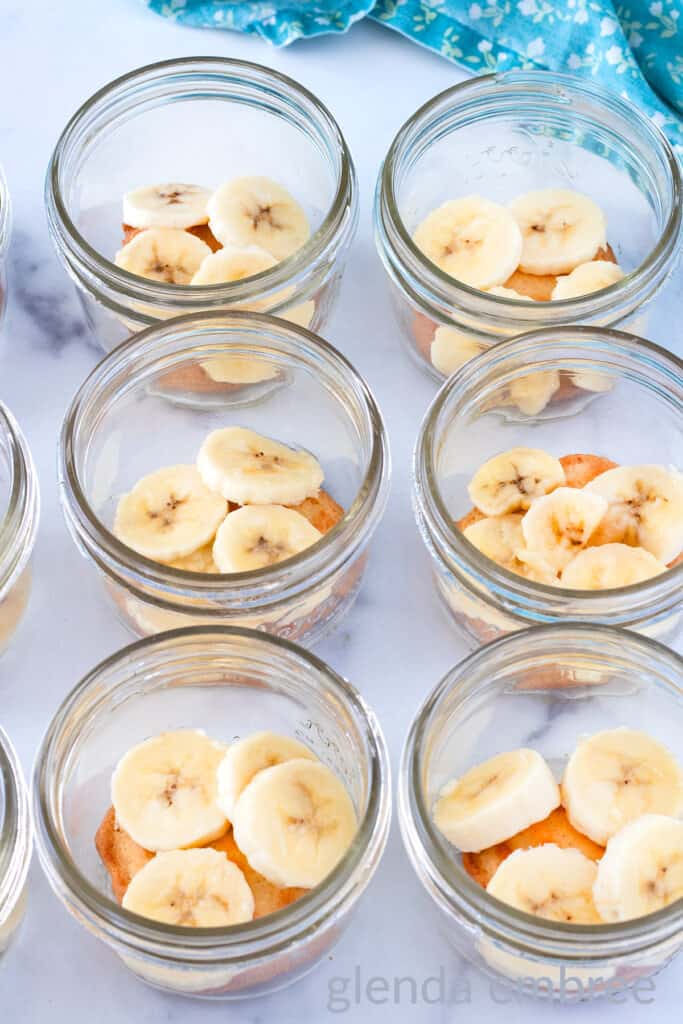
- Cover the bottom of each jar with a cookie. Lay one or more cookies in the bottom or break the cookies into large pieces and cover the bottom of the jar.
- Add a layer of banana slices to cover the cookie.
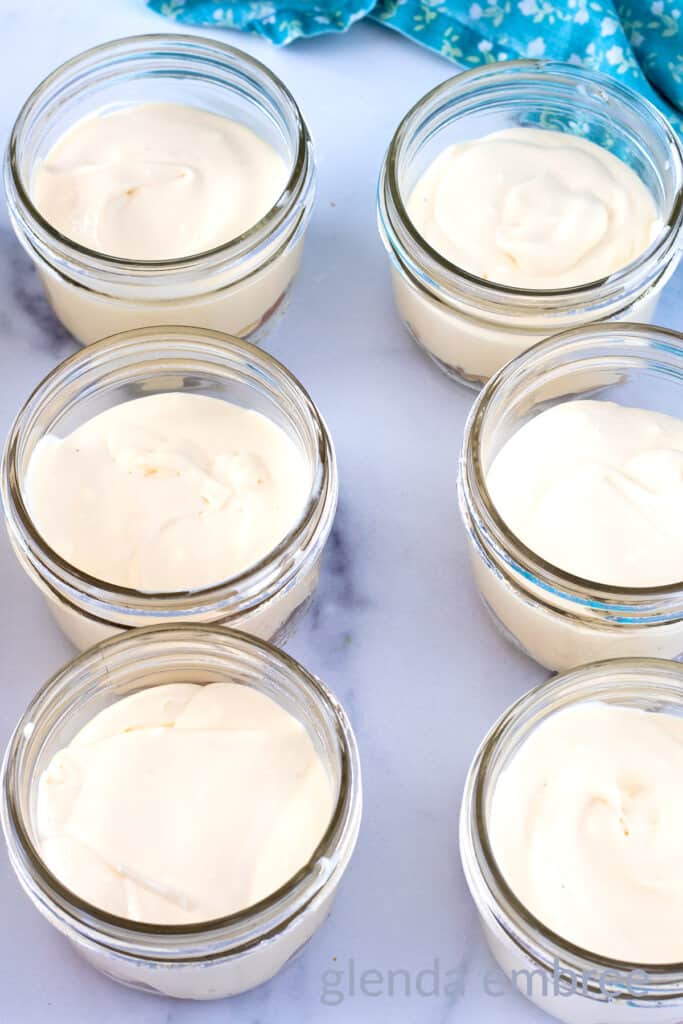
- Spoon in a layer of banana pudding. Cover the bananas completely so no air can reach them.
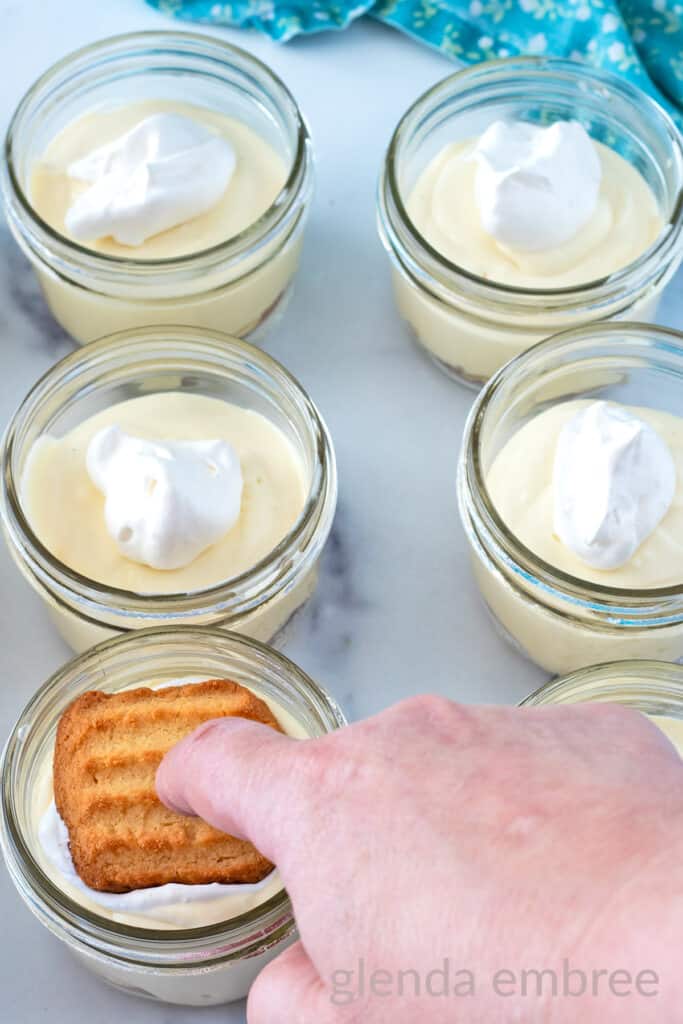
- Place a dollop of Cool Whip over the pudding and spread to the edges of the jar.
- Repeat all the layers – cookie, bananas, pudding and whipped topping.
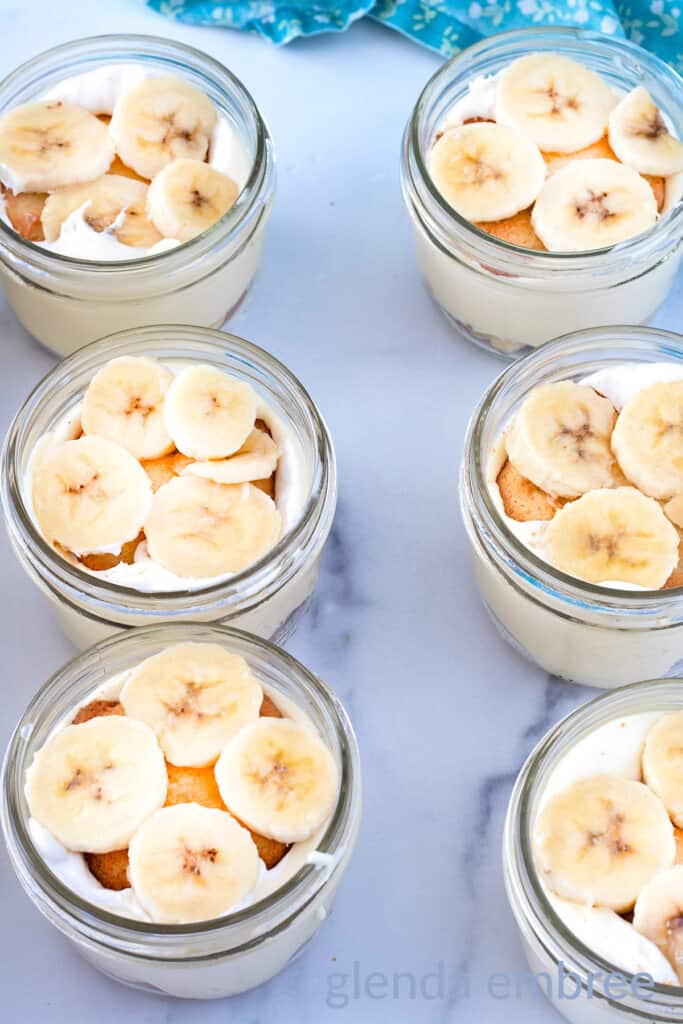
- If you will serve them immediately, decorate the tops with another shortbread cookie and a couple banana slices and serve within 20 – 30 minutes.
- If you won’t be serving the banana pudding cups for 30 minutes or more, leave off the final dollop of whipped cream, cover tightly and wait to decorate the tops until just before serving.
- Store the finished mini banana pudding cups tightly covered in the refrigerator until ready to decorate and serve.
That’s it. SO easy! These are going to move to the top of your family’s favorite desserts list. I can’t wait for you to make Banana Pudding Cups for Easter, graduation or your next backyard BBQ. They’re creamy, luscious and absolutely delicious! And they’re perfect for any occasion.
The Recipe
Want to Save This Recipe?
Enter your email & I’ll send you the link so you always have it at your fingertips. Plus, I’ll send a collection of easy recipes to your inbox every Friday!
By submitting this form, you consent to receive emails from Glenda Embree.
Banana Pudding Cups
- Total Time: 20 minutes
- Yield: 9 servings 1x
Description
Banana Pudding Cups are delicious, easy to make mini desserts. Classic banana pudding, loved by all and made into easy, delectable, make-ahead treats. You’ll get rave reviews wherever you serve them – family dinners, picnics, graduations, bridal showers and backyard bbqs. They’re perfect for any event.
Ingredients
- 1 (5.1 oz.) box banana instant pudding mix
- 2 1/2 cups cold whole milk
- 1 Tablespoon homemade vanilla extract
- 1 (14 oz.) can sweetened condensed milk
- 2 (8 oz.) tubs Cool Whip, thawed
- 4 bananas
- 18 Shortbread Cookies (or a package of Nilla Wafers, if you prefer)
- optional: 9 shortbread cookies and banana slices for garnish
Instructions
- Organize your jars or cups into an assembly line work station and then start your pudding.
- Pour the banana pudding mix, cold milk and vanilla extract in a large mixing bowl and whisk until thoroughly combined and thickened.
- Whisk in the sweetened condensed milk.
- Dump 1 tub of Cool Whip into the pudding mixture. Fold together until it is fully combined. Save the second tub of Cool Whip for layering and decorating the top. You’ll end up with some Cool Whip left over at the end.
- Slice the bananas into 1/4-inch thick rounds.
- Take the cookies, pudding and remaining Cool Whip to the assembly line work station you created.
- Cover the bottom of each jar with a cookie. Lay one or more cookies in the bottom or break the cookies into large pieces and cover the bottom of the jar.
- Add a layer of banana slices to cover the cookie.
- Spoon in a layer of banana pudding. Cover the bananas completely so no air can reach them.
- Place a dollop of Cool Whip over the pudding and spread to the edges of the jar.
- Repeat all the layers – cookie, bananas, pudding and whipped topping.
- If you will serve them immediately, decorate the tops with another shortbread cookie and a couple banana slices and serve within 20 – 30 minutes.
- If you won’t be serving the banana pudding cups for 30 minutes or more, leave off the final dollop of whipped cream, cover tightly and wait to decorate the tops until just before serving.
- Store the finished mini banana pudding cups tightly covered in the refrigerator until ready to decorate and serve.
Notes
Tips for Recipe Success:
- Choose the best container. Use wide-mouth cups or jars, which are easy to fill and eat from. If you are making your banana puddings ahead of time, be sure the jars or cups you choose have air-tight covers. I love the half-pint wide-mouth jars from Kerr [affiliate link]. They seal tightly and can be used over and over again. With the lids on, they can be stacked to store, and they’re easy to carry around whether your party is indoors or out.
- Protect your banana slices. Be sure your banana layers are fully sealed with pudding mixture right to the edge of the jar. It also helps to use bananas that are just ripe. Overripe bananas will brown much more quickly.
- Choose the right cookie. If making the dessert jars ahead of time, use a cookie that will hold up to the moisture of the bananas and pudding over the time they’ll be stored. Nilla Wafers are not a good choice for storing for more than a few hours, in my opinion. They get too soft and even soggy. That texture is a matter of personal preference, but I prefer the Dublin shortbread cookies. They stay firmer and still have a pleasant cookie texture after two to three days in the fridge. I purchase them at Walmart in the cookie aisle.
- Leave time for the dessert to set fully. Allow enough time for your banana pudding dessert cups to set in the fridge. The pudding will be soft set and ready to serve almost immediately, but for the best banana pudding cup texture, give this dessert at least an hour in the fridge.
- Choose the right pudding mix. If you have trouble finding banana instant pudding mix, you can use vanilla instant pudding mix instead. Preparing homemade banana pudding cups as quickly as this recipe intends requires the use of instant pudding mix. The cook-and-serve style of pudding takes longer to prepare, cool and set.
- Prep Time: 20 minutes
- Cook Time: 0 min
- Category: Dessert
- Method: Cold Prep
- Cuisine: American
More Easy Dessert Recipes


About Glenda
I believe cooking from scratch doesn’t have to be complicated and that YOU can do it. My simple recipes, tutorials, and cooking tips will help you get weeknight dinners on the table with less stress. Forget takeout or the drive-thru. Let me show you how to make homemade easy. Read more...


I made these pudding and I love how the bananas added a natural sweetness to the dessert. So yummy! And I also used wide-mouth jars so perfect for individual servings. Such a tasty treat!
Glad you enjoyed them, Chantelle. Thanks!
I love how quickly this came together! Been craving sweets lately so I decided to make these banana pudding cups and they taste amazing! And it’s super easy to do since this doesn’t need any baking!
Eda, I’m glad they worked well to satisfy that sweet craving!
These banana pudding cups brought back childhood memories. They tasted just like the ones my mom used to make for me and my siblings when we were little. And my kids loved them too.
Irene, I’m so happy you enjoyed them! Those nostalgic memories that go along with cooking and sharing recipes are the best.
I made these for my daughter’s birthday party and both kids and adults enjoyed it. And I loved the shortbread cookie, it added a buttery richness that complements the bananas and pudding perfectly. So yum!
That’s a great birthday party idea, Celestine! Good to hear they were a hit.
Loved how creamy and delicious this banana pudding was! Good thing I made a batch to last me until the weekend!
Vee, you sound just like my husband. I always need to make enough that he’ll have some leftovers for later. Glad you enjoyed the recipe.
This recipe is so simple and so delicious. I used gluten free vanilla wafers and my family loved this.
Gwen, I’m thrilled to hear you’re making the recipe your own. Simple recipes our families love are always the best, aren’t they?