Checkerboard Sandwich Cookies
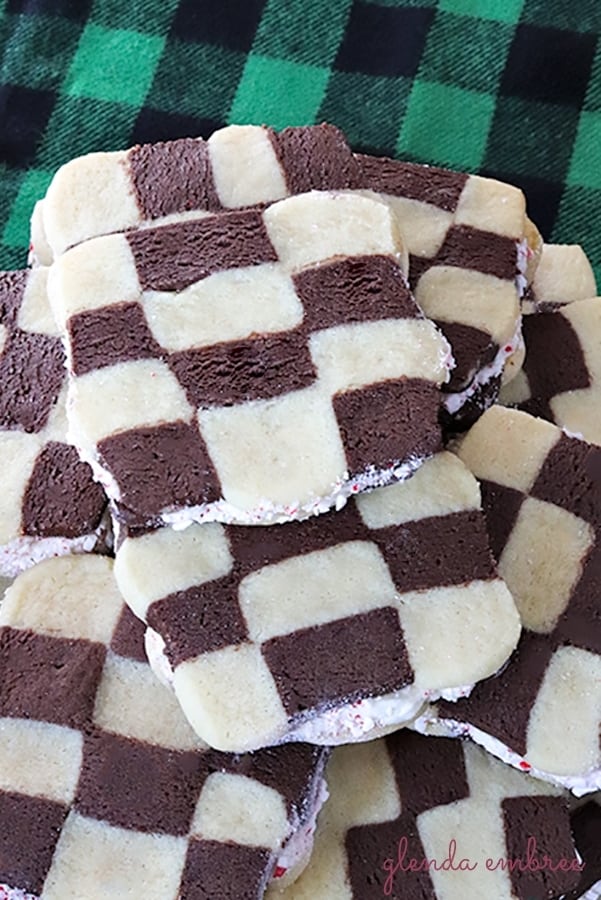
Checkerboard Sandwich Cookies are a delicious twist on slice and bake sugar cookies. They’re a yummy sandwich of soft, chocolate and vanilla cookies held together with scrumptious buttercream icing.
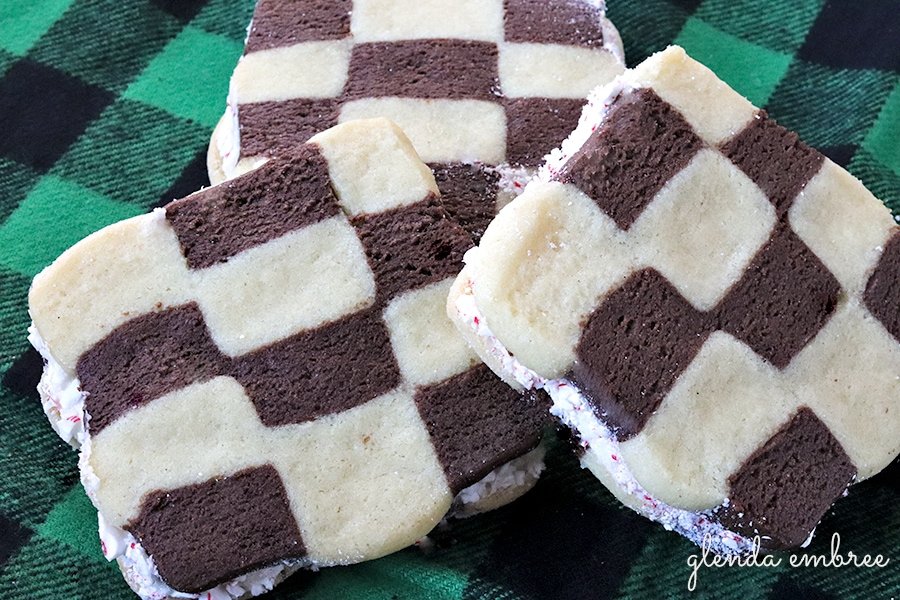
To “Christmas” them up, I added some crushed candy cane around the edges of the Checkerboard Slice and Bake cookies. You guys, they’re SO good!
I couldn’t be happier with how they turned out. I’ll be adding this fun experiment to my regular holiday baking, going forward.
Slice and Bake Cookies are a good solution for a quick and simple dessert, later on.
The great thing is that the dough keeps in the fridge for a week or more. Wrap the dough properly and it can be frozen for 3-4 months, too.
Knowing you have cookie dough ready to bake at a minute’s notice…yeah, that could be a good thing. lol
Having them be so unique is just an added bonus that will have your guests oooohing and aaaaahing.
…….
In This Post:
The Ingredients
The good news is that slice and bake sugar cookies, or slice and bake any-kind-of-cookies, are no secret formula.
Pretty much all basic cookie recipes can be rolled into a log, refrigerated or frozen and cut off in slices for baking.
So, a simple cut-out sugar cookie recipe with ingredients you already have in the pantry will be a piece of cake.
- Butter
- Sugar
- Eggs
- Vanilla
- Flour
- Salt
- Baking Powder
- Baking Soda
- Baking Cocoa
The Buttercream Icing used as filling in these sandwich cookies, combines butter and vanilla, along with milk and powdered sugar.
How to Make Checkerboard Sandwich Cookies
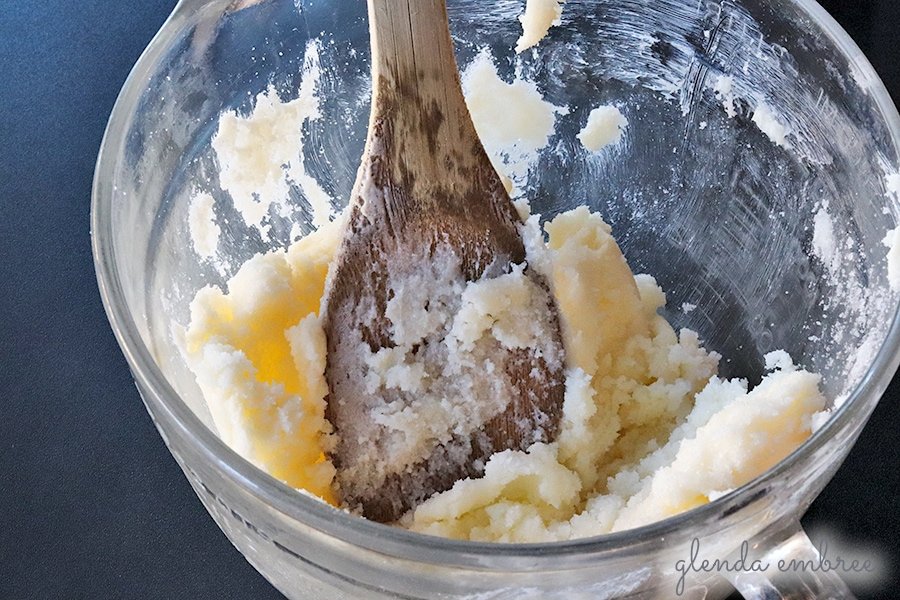
Mixing up the dough, is standard cookie baking procedure. Cream the butter and sugar. Beat in the eggs and vanilla.
Add all the dry ingredients, except the cocoa, and mix to combine.
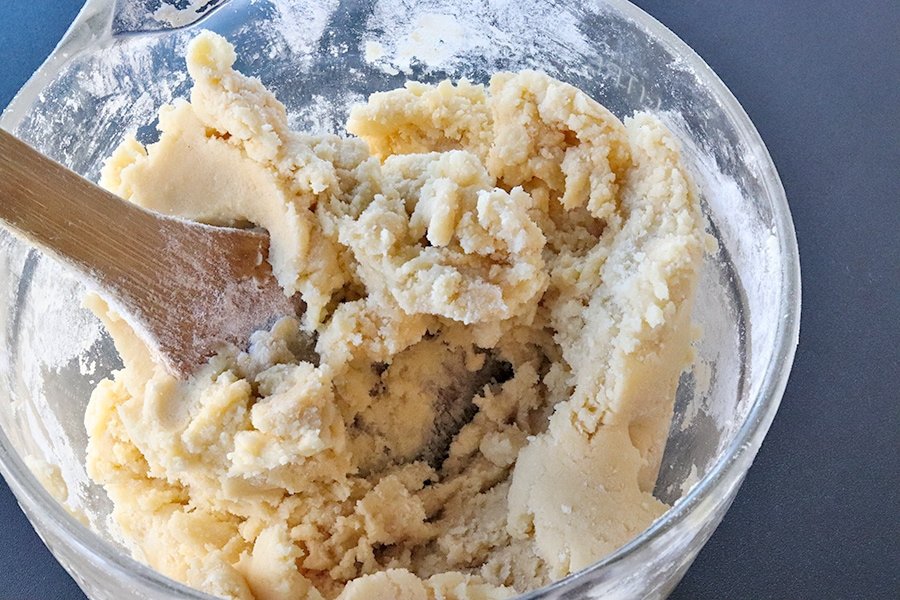
I’ve been telling you guys, all week, that you can easily mix up cookies by hand, even though I’ve got my stand mixer in all the photos. So, to prove my point, I mixed these by hand. Easy peasy! If you don’t have a stand mixer, you can still make any of my cookie recipes. Tossing everything in my *Bosch Universal is more force of habit, than a necessity. And now, you have proof!
Once the dough is mixed, turn it out onto a big sheet of waxed paper or a silicone mat. Knead it a few times until it comes into a smooth ball. Then divide the dough in half. Set aside one of the halves.
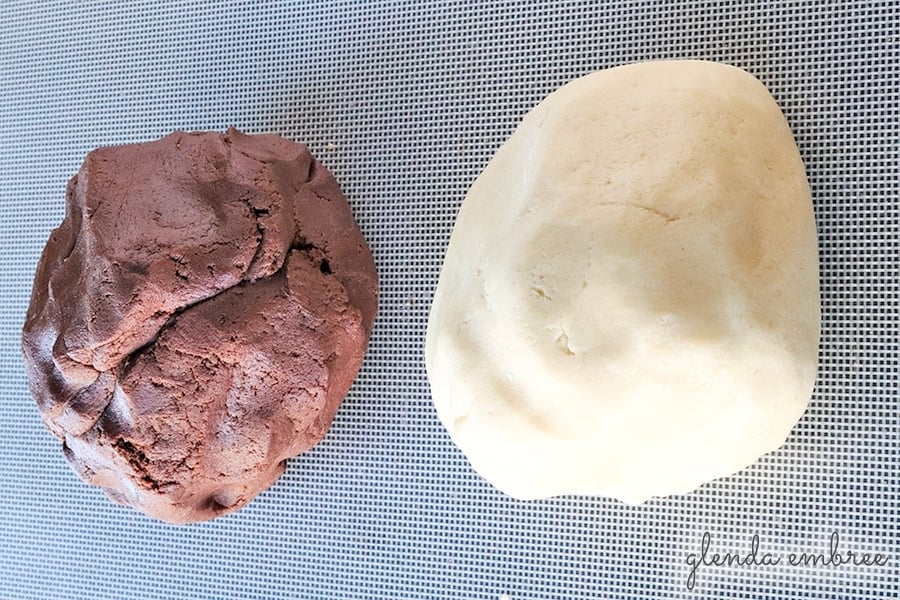
Dump the cocoa onto the silicone mat (or waxed paper) and knead it into the remaining half. Keep kneading until all the cocoa is fully incorporated. Now, you have a ball of chocolate dough and a ball of vanilla.
Shaping the Checkerboard
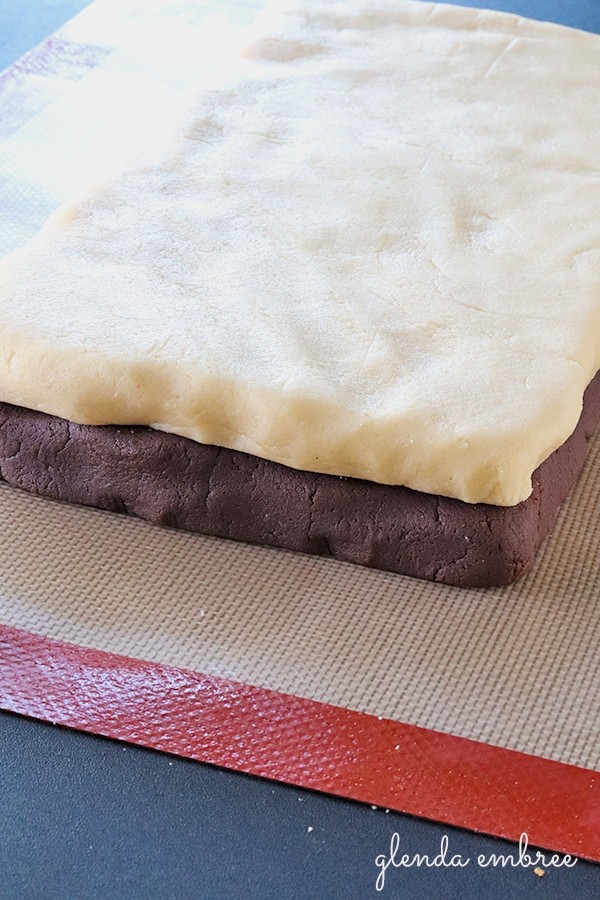
On clean sheets of waxed paper (or on a silicone mat), pat each of the dough balls into a rectangle about 1/2 inch thick. The rectangles will be roughly 5×11.

Just pat them out with your hands. It’s easier to fill that they are uniform thickness if you do it by hand. Also, if you were making these to sell, I would say, “Yes, measure to the exact fraction of an inch. Be precise. But this is for friends and family. It’s for fun. Don’t sweat the small stuff, They’re going to be beautifully imperfect. And delicious!

Refrigerate the two rectangles of dough for 30 minutes (or put it in the freezer for 15 minutes.). Once the dough has chilled, it will be easier to work with.
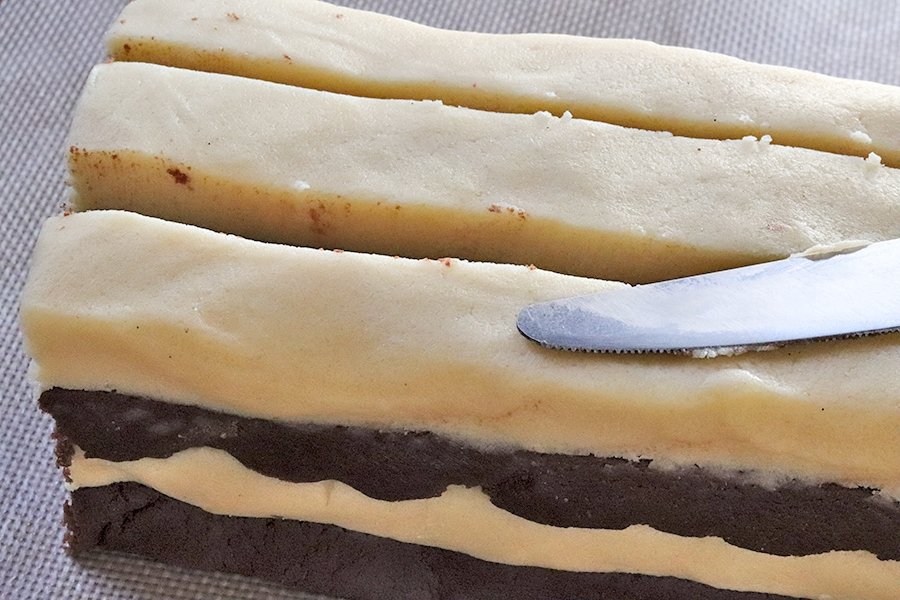
Remove the dough from the fridge and lay one rectangle on top of the other. It doesn’t matter which order.
Use a butter knife and cut the dough in half, lengthwise. Now you have two double-stacks. Place one of them on top of the other.
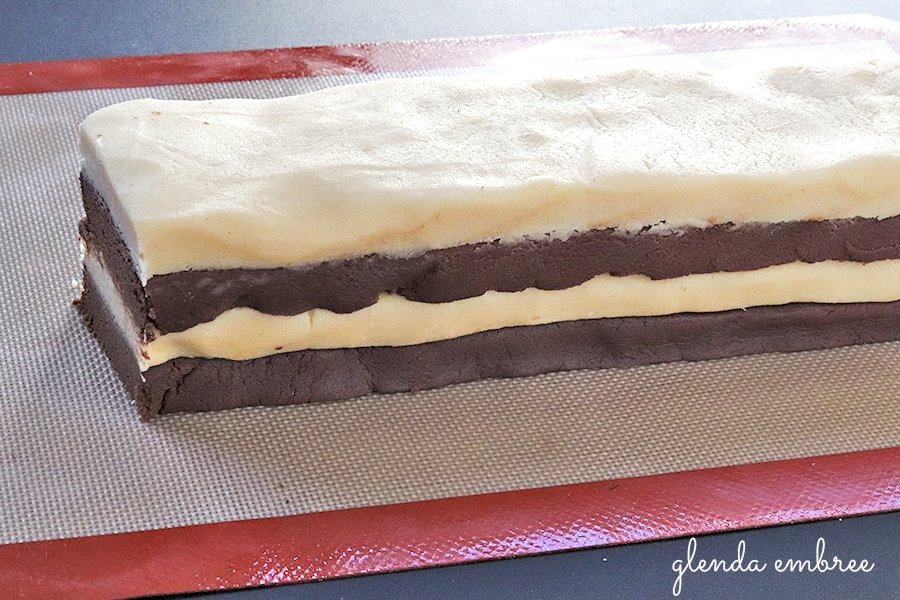
Now, slice the dough lengthwise, again. This time into thirds. Do your best to make the sections equal width, but again, this isn’t life or death. Mine were 100% even and my cookies still turned out fantastic!
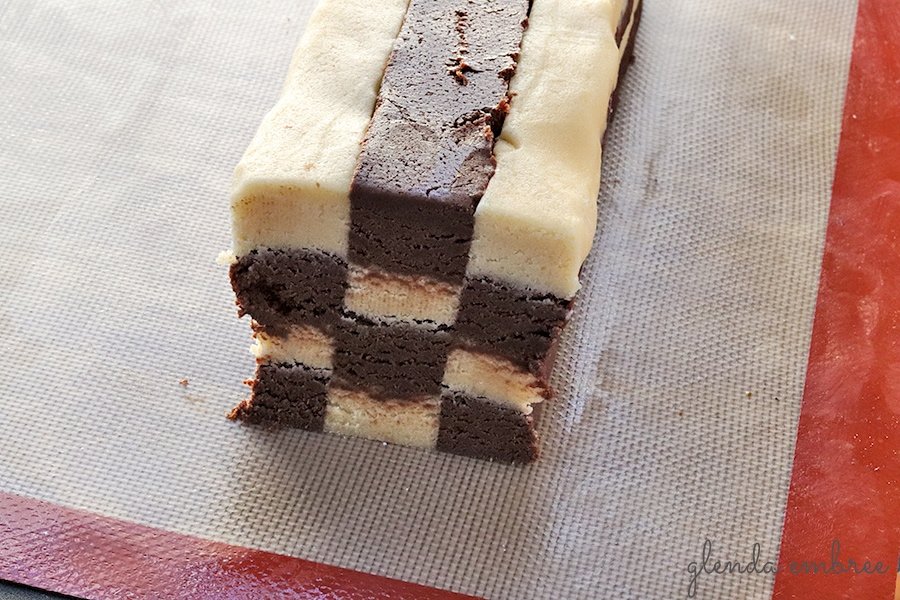
Once you’ve cut the dough in thirds, you almost have your checkerboard. Lift the middle strip of dough and flip it completely upside down. The top of your dough block will now have 3 alternating colors.

Use your hands to gently press the three sections of dough back into a long rectangular log. The dough will be getting soft after working with it so much. That’s ok. Get it back to a smooth rectangular shape. Trim the ends if they are uneven. Look at the ends. You’ll see your checkerboard pattern!
Now take your checkerboard log and refrigerate it, again, for at least 30 minutes or until you’re ready to bake the cookies.. Once it’s firmed up, you’ll be ready to bake cookies.
Baking and Filling Checkerboard Sandwich Cookies
Once you’re ready to bake, remove the checkerboard log from the refrigerator and slice off 1/4 inch cookies. Place them on a greased or lined baking sheet and bake.
While you’re waiting for all the cookies to bake, you can be mixing up the icing. Beat the butter, vanilla and milk with a hand or stand mixer. Mix in the powdered sugar to form a soft but firm frosting.
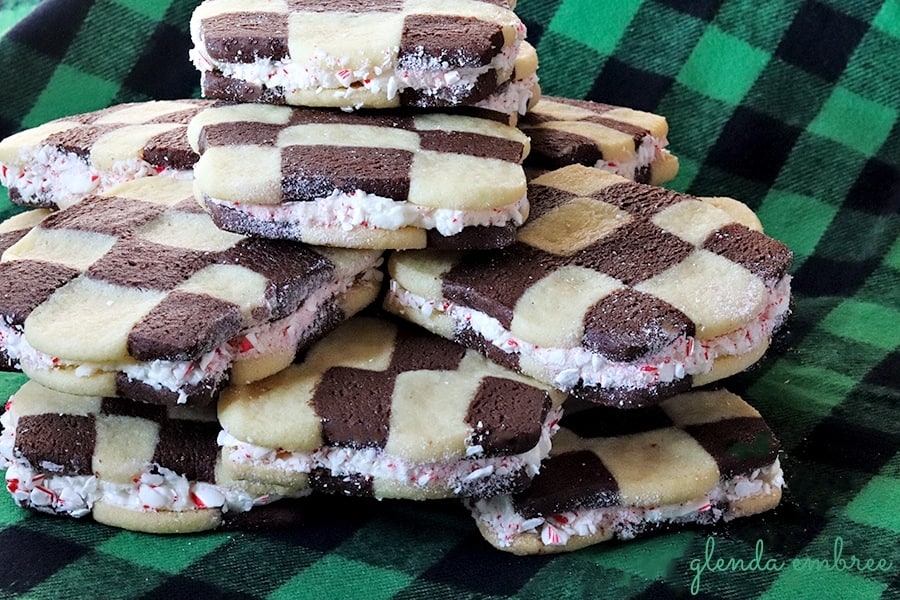
Once the cookies are completely cooled, spread icing on the bottom of 18 cookies. Top them with 18 more cookies, forming the sandwiches. You can add decorations around the edges of the frosting if you want. Sprinkles would be cute. I crushed candy canes and pressed the dust around the sides of the cookies. These cookies are just as good with no decoration at all, though. The creamy buttercream filling is all they need!
Enjoy your beautifully delicious creations! You rocked it!
The Recipe
Want to Save This Recipe?
Enter your email & I’ll send you the link so you always have it at your fingertips. Plus, I’ll send a collection of easy recipes to your inbox every Friday!
By submitting this form, you consent to receive emails from Glenda Embree.
Checkerboard Sandwich Cookies
- Total Time: 2 hours 38 minutes
- Yield: 18 sandwich cookies or 36 individual cookies 1x
Ingredients
For the Cookies:
- 1 cup butter
- 2 cups sugar
- 2 eggs
- 1 Tablespoon vanilla
- 3 1/2 cups flour
- 1 teaspoon salt
- 1 teaspoon baking soda
- 1/2 teaspoon baking powder
- 1/2 cup cocoa powder
For the Buttercream Icing:
- 3/4 cup butter
- 1 Tablespoon vanilla
- 1 Tablespoon milk
- 6 cups powdered sugar
Instructions
- Cream together butter and sugar in a large mixing bowl.
- Beat in the eggs and vanilla.
- Add the dry ingredients and continue to mix until you have incorporated all the ingredients into a
- consistent dough. The dough will be a little shaggy, but completely mixed.
- Turn the dough out onto a silicone work surface (mat) or a piece of parchment paper. You don’t
- want to work any more flour into the dough, so don’t flour your countertop. Even wax paper may
- work.
- Knead the dough for about 15 to 30 seconds to get it into a smooth ball.
- Divide the dough in half and set one half aside.
- On your kneading surface, add the cocoa powder and work to knead it into one of the dough halves.
- It will take 1 or 2 minutes to get it completely incorporated so you have a smooth, glossy chocolate ball.
- On a clean sheet of parchment, or on a silicone baking mat, press the chocolate dough half into a rectangle ½ inch thick and about 10 ½ inches x 5 inches. Lift the mat (or parchment onto a baking sheet and set aside.
- On a second sheet of parchment, or on a silicone baking mat, press the plain dough half into a rectangle ½ inch thick and about 10 ½ inches x 5 inches. Lift the mat (or parchment onto a baking sheet.
- Place both baking sheets in the freezer for 15 minutes or in the refrigerator for 30 minutes.
Once the dough is chilled and easy to work with, remove it from the freezer or fridge and begin to form the checkerboard pattern. - Start by laying one slab of dough on top of the other. It doesn’t matter which is on top, only that the colors are alternating.
- Slice the stack of dough down the middle lengthwise, dividing it into two equal halves.
Now, cut through the entire stack, lengthwise, dividing that into thirds. (I would say EQUAL thirds, because that is the goal. But, seriously, be as precise as you can without sweating it. These are for your family and friends and they are going to swoon at your creativity and how wonderful these taste. If you were making them to sell, then I’d say, “You bet, measure everything down to the millimeter and have it exact.” That, however is not what we’re doing, today. ) - There will be three long strips of stacked dough, now. Pull the one from the center, flip it completely upside down and set it right back in the center.
- Gently put pressure on the outside layers to begin forming them into one solid block. Flip the block a quarter turn and do the same thing. You want all the layers to begin to meld together.
- Place the log back in the freezer for 15 minutes (or fridge for 30). NOTE: I have never removed the dough from the silicone mat this entire time. If you are using parchment and it is ripped or torn from the slicing, you may want to put the block onto a clean sheet before sticking in the freezer.
- After the correct amount of chilling time, remove the checkerboard block from the freezer and slice off cookies and bake.
- Cut the cookie log into ¼ inch slices. Put 12 cookies to a cookie sheet. (The recipe typically makes 3 dozen for me, so I fill 3 sheets at once, putting 2 back in the fridge or freezer until time for them to go in the oven.)
- Bake at 350° for 8-11 minutes, depending on your oven and whether you want the cookies soft or crunchy. We opt for soft.
- Remove from the oven and place the cookie sheet on a cooling rack for 2-3 minutes to allow the cookies to finish setting up. Then transfer them to the rack to finish cooling.
- To make frosting, beat all icing ingredients together with a hand mixer or in a stand mixer, until a thick creamy frosting has formed.
- To make the sandwich cookies, spread the bottoms of 18 completely cooled cookies with ¼ inch of buttercream frosting. (You could color the frosting or flavor it, if desired.) Top with a second cookie.
- Optional: I crushed 2 candy canes and pressed the sides of each cookie into the crushed candy cane dust to decorate the outsides.
- Prep Time: 150 minutes
- Cook Time: 8 minutes
- Category: Desserts, Cookies
- Cuisine: American
More Delicious Cookie Recipes
Here are three more DELISH cookie recipes from our 12 Days of Christmas Cookies blogger event.
- German Spice Cookies, from Arlene, at Flour on My Face
- Chunky Peanut Butter Cookies, from Lois, at Walking on Sunshine Recipes
- Sugar Roll Cookies, from Lenny, at Fat Dad Foodie
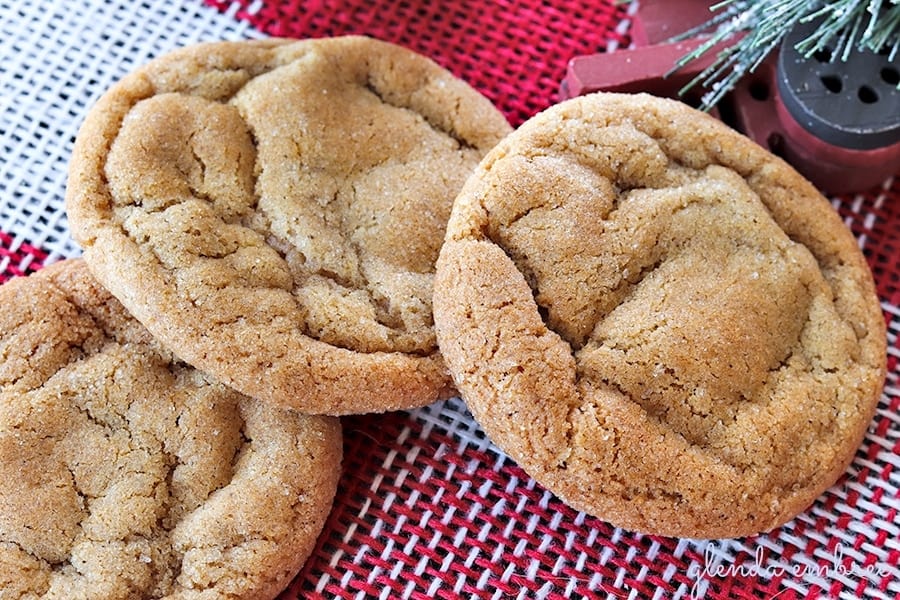
And, if you’re looking for even more cookie recipes to add to your holiday repertoire, check out my recipe for these yummy Soft Chewy Ginger Cookies.