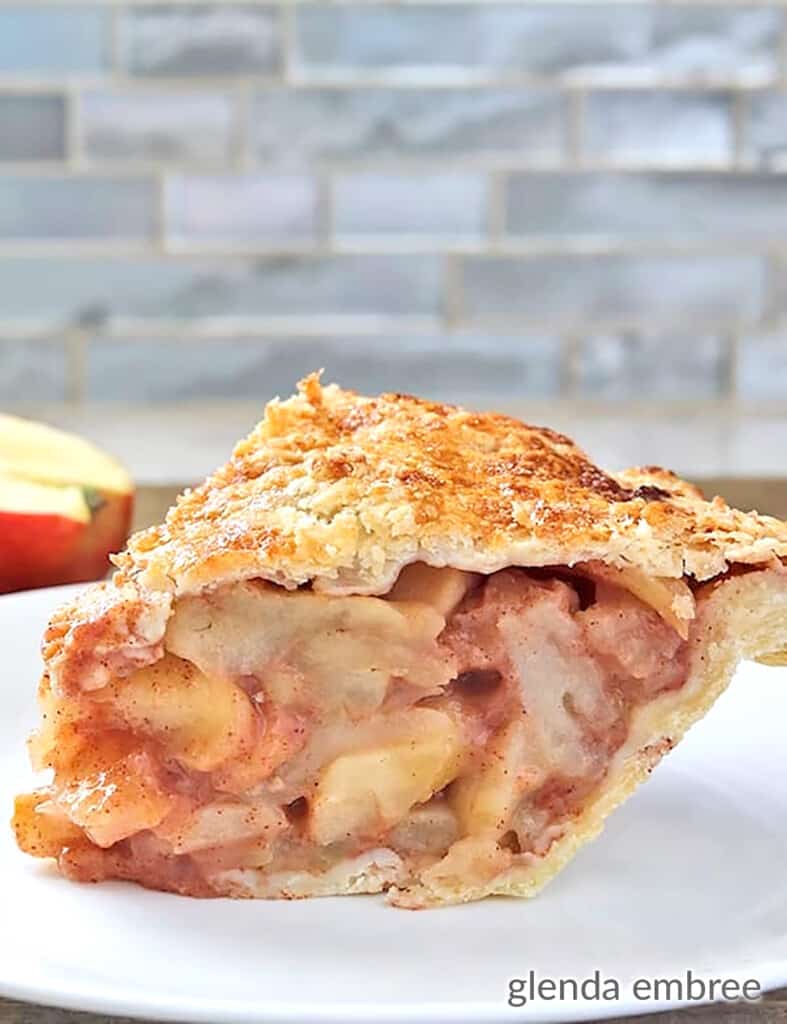
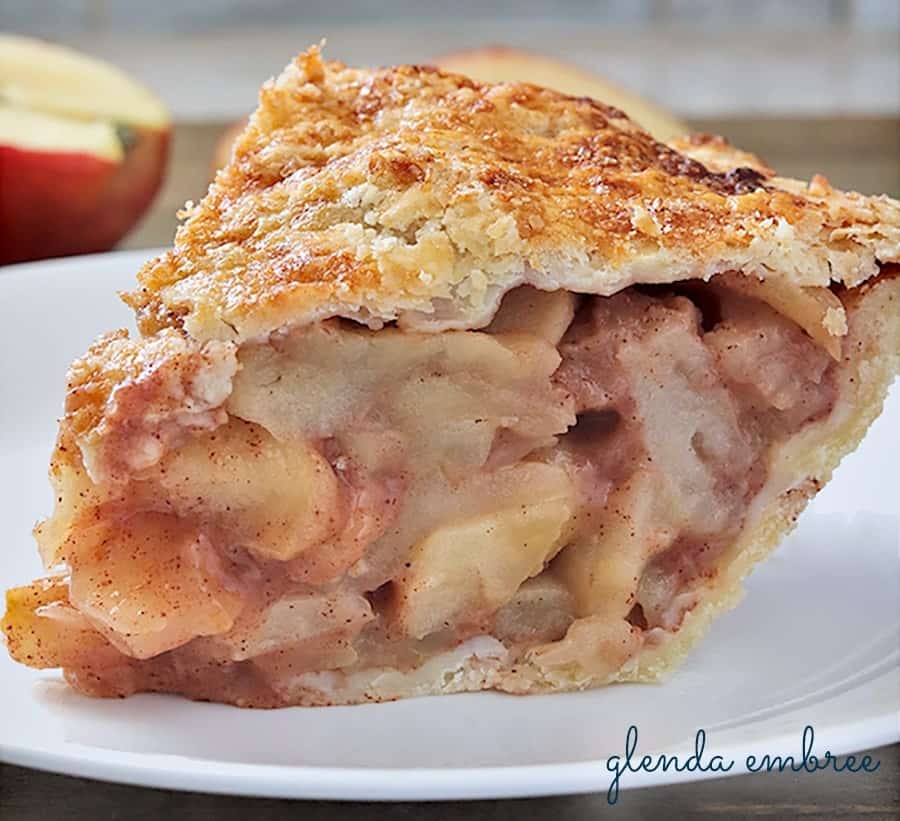
My scrumptious Homemade Apple Pie has crisp, buttery, flaky crust. It’s bursting with three varieties of juicy sweet-tart apples and the warm spices of cinnamon and nutmeg.
My husband says it’s the best apple pie recipe he’s ever eaten. That’s high praise from a man who knows his way around a pie! lol
Homemade Apple Pie is classic Americana. Whether for summer picnics, 4th of July, Thanksgiving, Christmas or just to usher in fall and the harvest season, apple pie is a favored dessert for celebrations and holiday gatherings. It’s a beloved symbol of comfort, being welcome and being home.
So, how is it that those three words: homemade, apple, pie, can also instill panic and fear into someone who’s asked to bake one? Sadly, pie baking is becoming a lost art. While making an apple pie is NOT difficult, the process does have many steps.
It IS a commitment of time. For many, in our instant gratification society, it’s not an investment that seems to make sense, any more.
Baking a pie is definitely a labor of love. But, oh my goodness, the reward is heavenly! Nothing you buy pre-made will ever come close to this apple pie recipe.
You should make this Homemade Apple Pie for only your most special people — the ones who will appreciate your delicious gesture. It’s a dessert for celebrating!
Make this pie. You can do it! You’re gonna rock someone’s world!
The Ingredients
For the Pie Crust:
- Unbleached All Purpose Flour
- Salt
- COLD butter
- Ice Water

For the Apple Pie Filling:
- Apples; peeled, cored and sliced (between 6 & 7 lbs)
- Unbleached All Purpose Flour
- Sugar
- Cinnamon
- Nutmeg
- Lemon Juice
For Finishing the Apple Pie:
- Butter
- Egg Wash
- Coarse Sugar
How to Make Homemade Pie Crust
We’ve convinced ourselves that pie crust for apple pie recipes, or any other pie, is difficult to make. It really isn’t. There are just a couple hard-and-fast rules to remember and your pie crust will be flaky perfection every time.
- Keep the butter and water icy COLD!
- Don’t overwork the dough.
- Always chill the dough at least 30 minutes before rolling it out.
If you can remember those simple rules, your homemade apple pie crusts will always be flaky and tender.
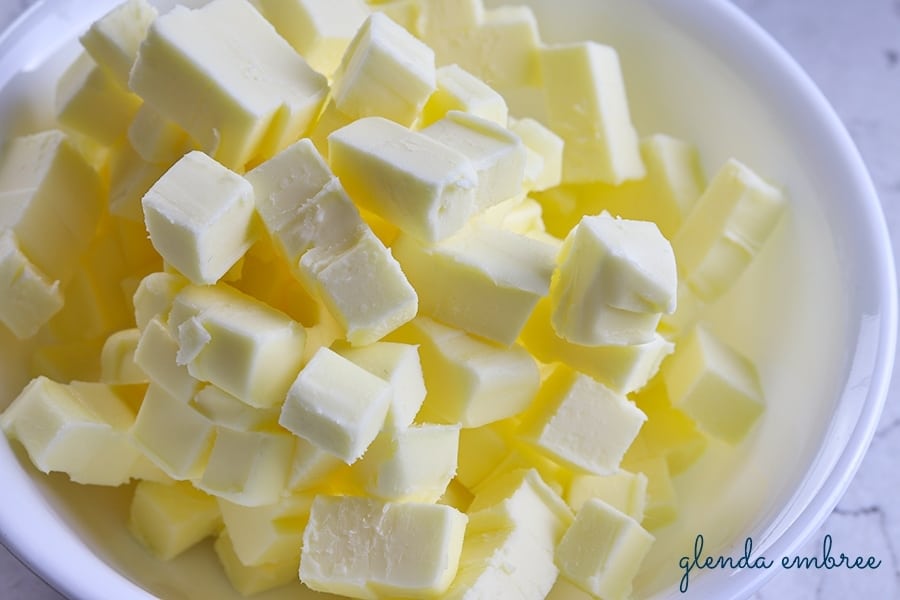
When making pie crust, start by cubing the butter. Take each stick and cut it into 3 long planks by slicing it into thirds, lengthwise. Then, leaving the planks stacked, turn them on their uncut side and slice the stick into thirds, lengthwise, again. That creates 9 long sticks, all stacked together.
Now, cutting from the end of the sticks, slice off small cubes. Toss all the cubes into a bowl and stick them back in the fridge, while you prepare the other crust ingredients for your homemade apple pie recipe.
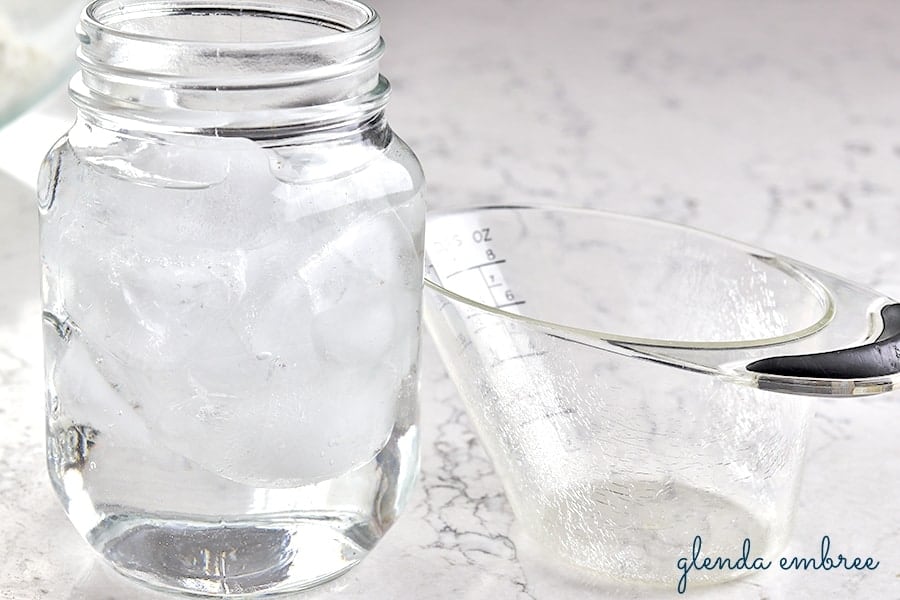
Next, prepare a glass or jar with fresh ice water. Make sure it has about 1 cup of water and then add the ice. Set it and your liquid measuring cup nearby. It’s time to mix everything, together.
Combining the Pie Crust Ingredients: The Butter
- Add the flour and salt to a large bowl. Stir them together.
- Next, add the cold butter cubes to the flour/salt mixture.
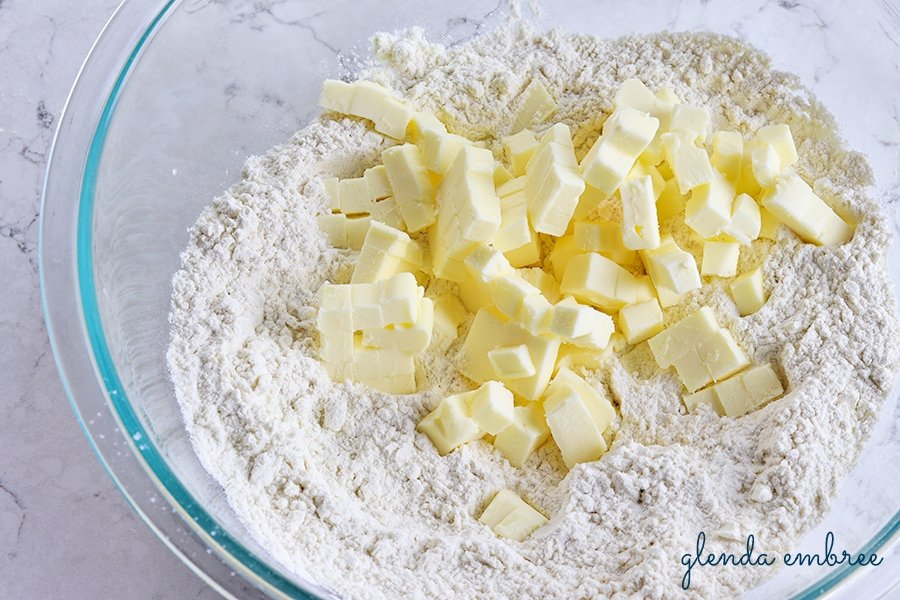
- For these next steps, you could use a fork or a pastry blender. I’m going to recommend you use your hands. It’s good to get a “feel” for how the pie dough comes together.
- Because, it’s important not to overwork it, using your hands lets you feel what stage the dough is at. Using your hands allows you to distribute the butter evenly, without “mixing it in” to the flour, too.
- (Don’t let these next steps scare you off. Remember, perfecting this crust is a big part of making your apple pie absolutely delicious. It’s worth the effort and you can definitely do this.)
- You want chunks and shmears of butter distributed all through the flour. Use your thumb and forefinger to squish and mash some of the butter cubes, leaving others whole, while you coat all of it in flour and distribute it through the mix. You’ll end up with a sort of dry, powdery mixture, with chunks and smaller pieces of butter throughout.

- Leaving pieces of butter is important because that’s what creates the flakiness in pie crust. The moisture in the butter will steam, pushing layers open as your crust bakes. As, the steam evaporates, the open layers will bake up flaky and crisp.
- Once you feel that the butter is distributed evenly through the flour mixture, even though it isn’t actually mixed into the flour, you are ready to pull the dough together. To accomplish this you will add the ice water, a little bit at a time.
Combining the Pie Crust Ingredients: The Ice Water
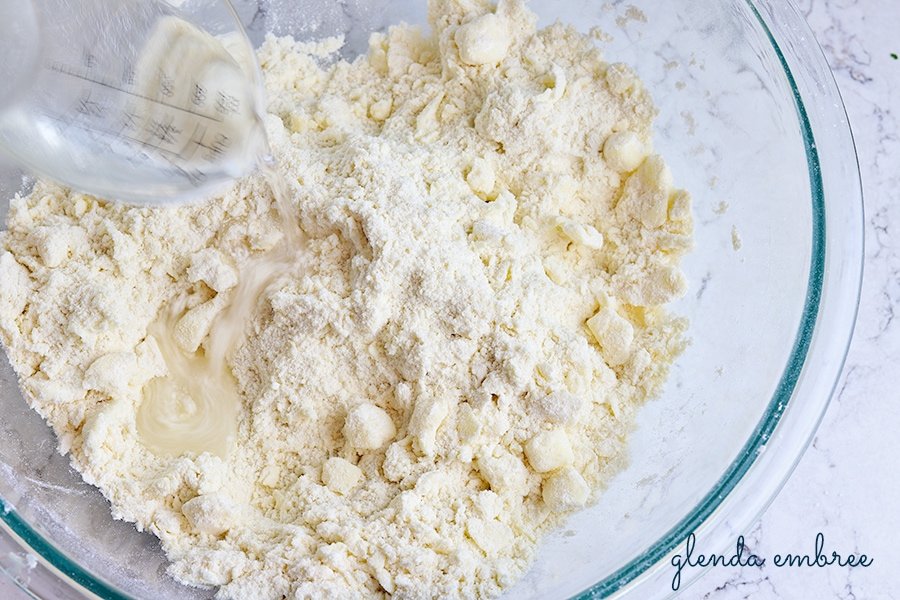
- Measure out 1/4 cup of the ice water and add it to the bowl of flour and butter. Very gently, with your hands, begin to mix the water into the flour. You will need more water, but how much will depend on the humidity, where you’re working.
- In the summer, with all it’s humidity, that 1/4 cup may be just about all the water you will need to pull the dough together. But, in the dry, heated air of winter, you will probably need to add at least the full 1/2 cup. I even used 1 Tablespoon more than that, today, to get mine to come together. After the initial 1/4 cup, add the additional water, 1 Tablespoon at a time, until you get the right consistency.
- Use your hand to lightly toss and stir the ice water into the flour. The dough is going to look shaggy, but it won’t be dry and powdery any more. Because you are being careful not to overwork it, the pie dough won’t be smooth, at this point. That’s the way it should be. You’re definitely doing it correctly.
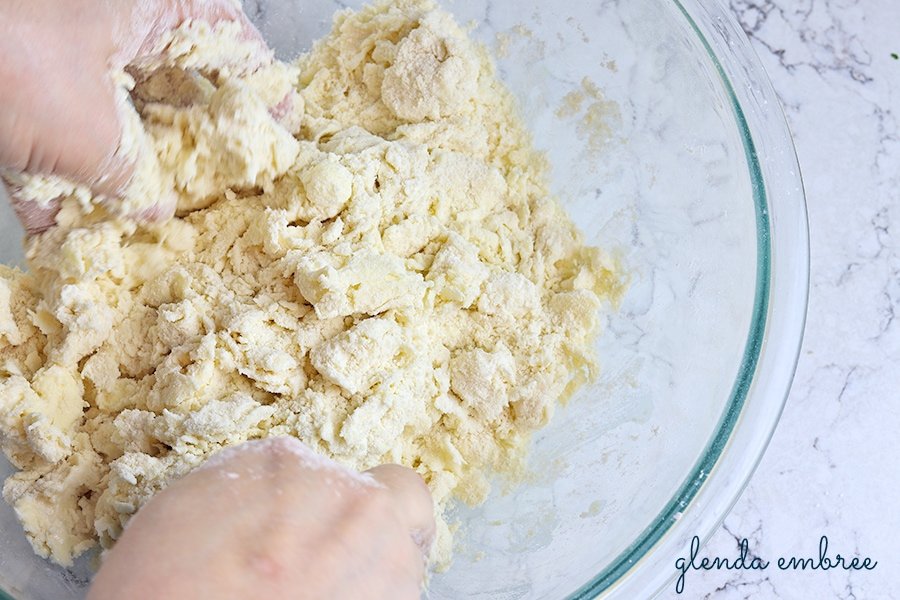
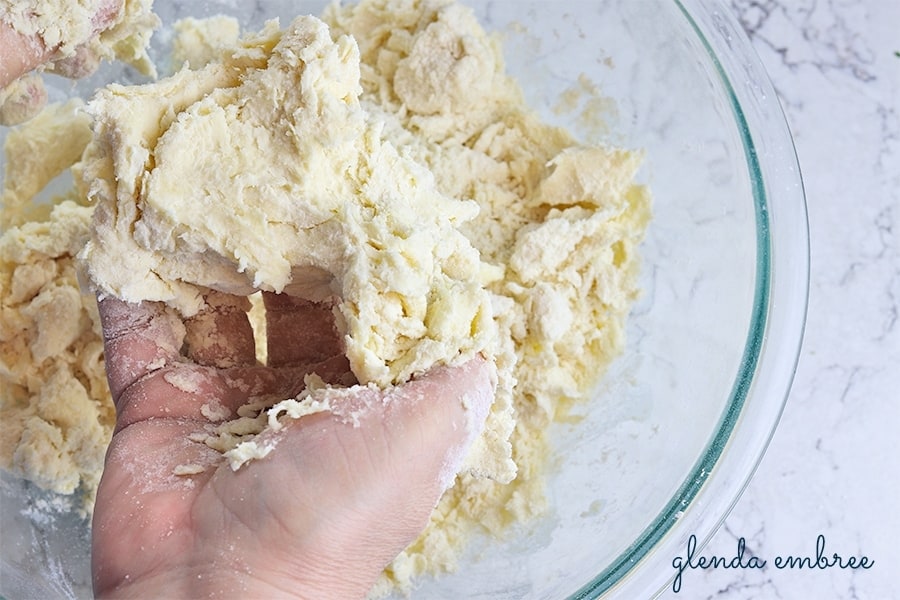
- You’ll know you’ve added enough water when the shaggy dough that’s forming, can be picked up in your hand and stays together in a clump when you give it a gentle squeeze. This is not going to be a pretty, perfectly smooth ball of dough. You’re working with it very minimally to preserve the structure of the butter and to promote a tender crust.
- You can see in the image, below, that the dough is shaggy and ragged in the bowl. But when I scoop up a handful and give it a gentle squeeze, it is holding together in one mass. It’s not crumbling and falling back into the bowl.
The Pie Crust Comes Together
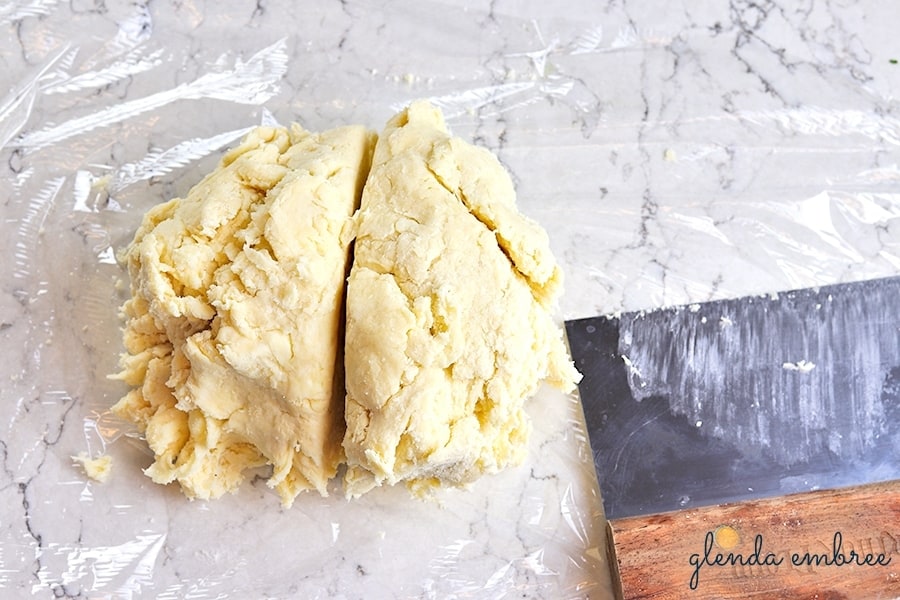
- Take the shaggy ball of dough and divide it in half.
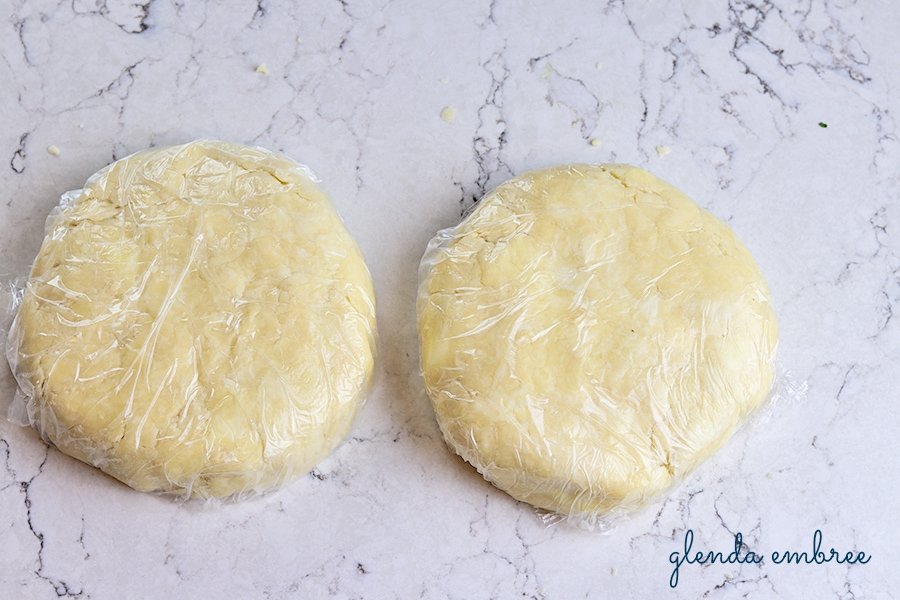
- Place each half on a sheet of plastic wrap and flatten into a 4- or 5- inch disk. Wrap the plastic wrap around each disk and place in the refrigerator for at least 30 minutes. Cold is your friend in this process.
- While the dough is chilling, you can make your homemade apple pie filling. (This apple pie recipe is delicious and you’ve just finished the scariest part. You’re rocking this!)
Making Homemade Apple Pie Filling
- Peel, core and slice 10 cups of apples for the apple pie filling. (That’s between 6 and 7 lbs, I think.) I use three different varieties of baking apples to get the best texture and flavor for my homemade apple pie. The varieties I like are granny smith, pink lady and honey crisp. Use the varieties of baking apples available in your area for your own apple pie recipe. I try to make the mixture equal thirds of each variety.
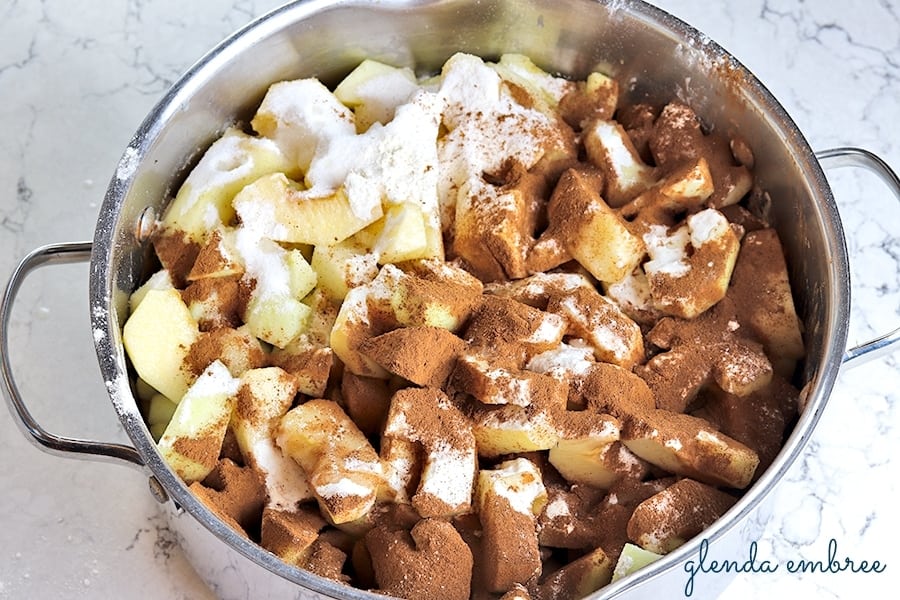
- Place the apple slices, sugar, flour, lemon juice, cinnamon and nutmeg into a large stock pot or dutch oven. Give it a good stir. I find that a wooden spoon works best for this. You need something sturdy.
- Begin heating the apple pie filling mixture over medium/low heat. Allow it to continue heating until the apples begin to soften, slightly, and a thick, smooth glaze has formed around them. You may even notice that the mixture has reduced in volume, as the apples soften. It will take about 15 minutes, usually. Give the mixture a stir two or three times throughout the cooking process.
- When the apples are done, set them aside and begin preparations to roll and fill your pie crust.
Tools for Rolling Pie Crust
I roll my crust on a silicone mat, so I don’t have to introduce too much extra flour into the dough. I tried out one that came with my crust protector rings. You’ll see it in the photos of this post. I’m very impressed with the rings, but the mat, not so much. I have tried to like it, because of the measurement markings. For me, though, it is just too thin. I still prefer my *heavy-duty silicone mat.

If you don’t have a silicone mat, you will need extra flour to lightly dust your countertop. That will prevent your crust from sticking to the counter as you roll it. You will also need to rub flour on your rolling pin, or lightly dust the top of your dough with flour, to keep the rolling pin from sticking to the dough as you roll out the crust. You will continue to apply a thin dusting, as you roll. So, keep a little extra flour, nearby.
I have used a wooden french rolling pin for years. It has become very worn and knicked and leaves my dough a little battered. Since taking the pictures for this post, I ordered a new rolling pin. It is a stainless steel pin with silicone guides that allow me to roll dough in an even thickness. It even came with a new bench scraper! I’m in love!
Roll the Bottom Crust
Ok. Let’s make this crust. But before you start, preheat your oven to 425°.
Lightly grease a *9″ deep dish pie plate.
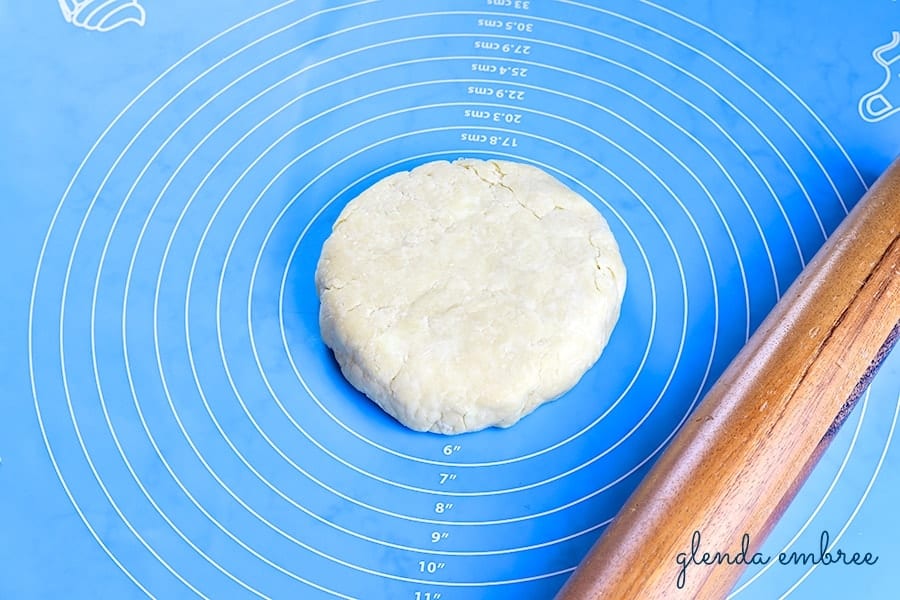
Remove one disc of pie dough from the fridge. Place it in the center of your lightly floured surface or *silicone mat. (Note the lighter colored marbling throughout the disc. That’s the streaks and lumps of butter that are going to make your crust spectacular!)
Start at the center of the disc. Apply even pressure and roll out to the edge. Go back to the center, repeating the process in a different direction. Work your way around the entire disc as it gets wider in diameter and thinner in thickness.
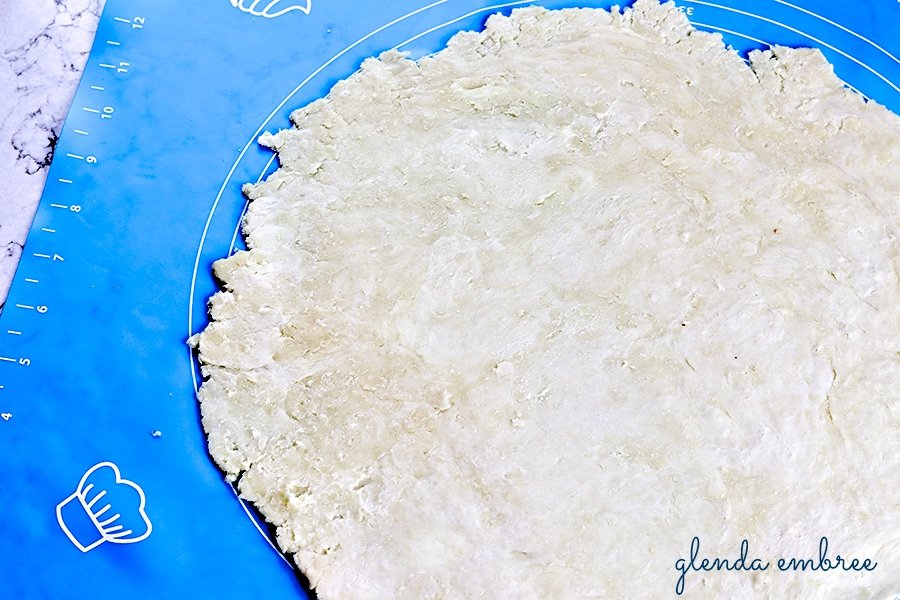
Always try to work from the center out, especially if you don’t have thickness guides for your rolling pin. That will help you to get a uniform thickness across the entire crust. Continue rolling until the dough is between 12″ and 13″ in diameter. That will leave enough dough to slide into the bottom of your pan, go all the way up the edges and have some overhang. (You will still see beautiful marbling of butter across the surface.)
Moving Your Pie Crust to the Pan
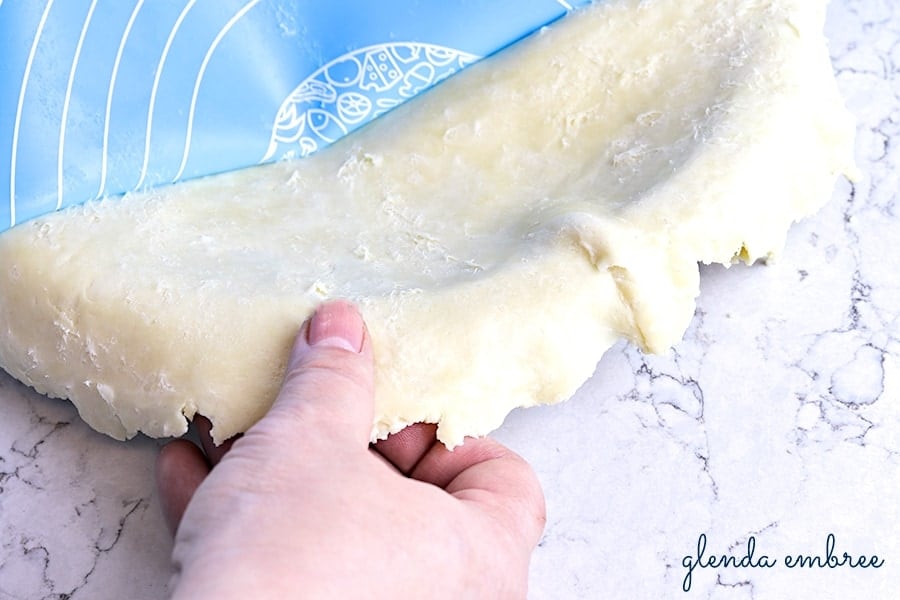
Moving the crust is probably the number one reason I love using a silicone mat for rolling pie crust. I simply position the pan in the center of the crust and then flip it, mat and all. The mat easily peels away from the crust, leaving it perfectly centered in the pan with no tears. EASY!
Without a mat, you will need to do some flour dusting. Start by doing a dusting of flour over your rolled crust. Then rub flour over the surface of your rolling pin. Start at the edge of the dough, closest to you. Lay the rolling pin at the edge and begin to loosely roll the dough onto the pin. When you have at least half of the dough rolled over the pin, you’ll be able to lift it onto the pan. Work carefully to center the crust over one half of the pan, then begin to unwind the rest off the rolling pin, into the other half of the pan. This can be little tricky, keeping the dough on the pin from sticking to itself. With practice, you’ll get it perfectly every time!
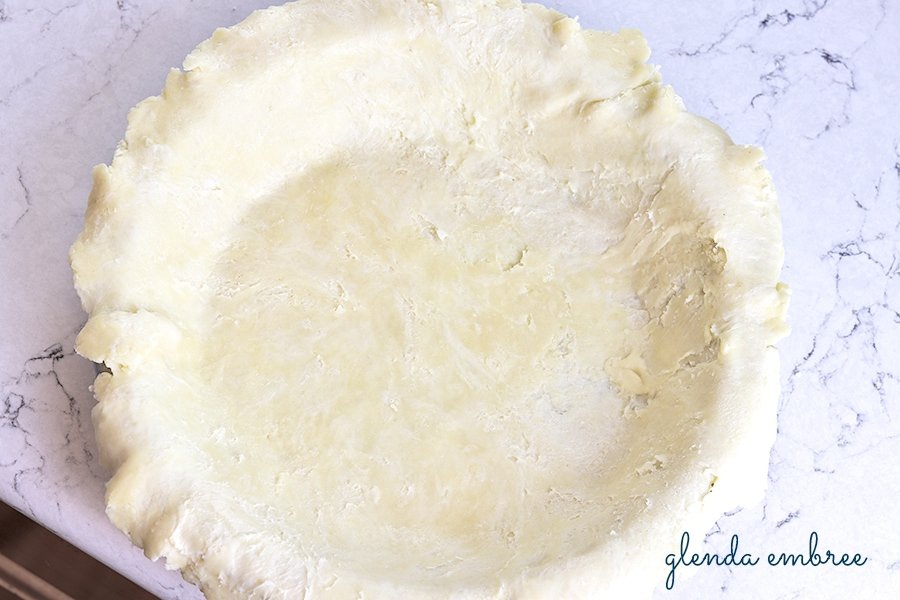
You want about a 1/2″ overhang on the edges of this bottom crust. You can trim any excess that is longer than that. You can see that my thin silicone mat didn’t peel away as cleanly as my favorite heavy-duty one. It still was great. I left it as it was and it worked perfectly. If you have tears or small holes you can press patches of dough into them or pinch small areas of dough together to make repairs.
Filling the Bottom Crust
Pour your prepared pie filling into the bottom crust. Mound it slightly in the center.
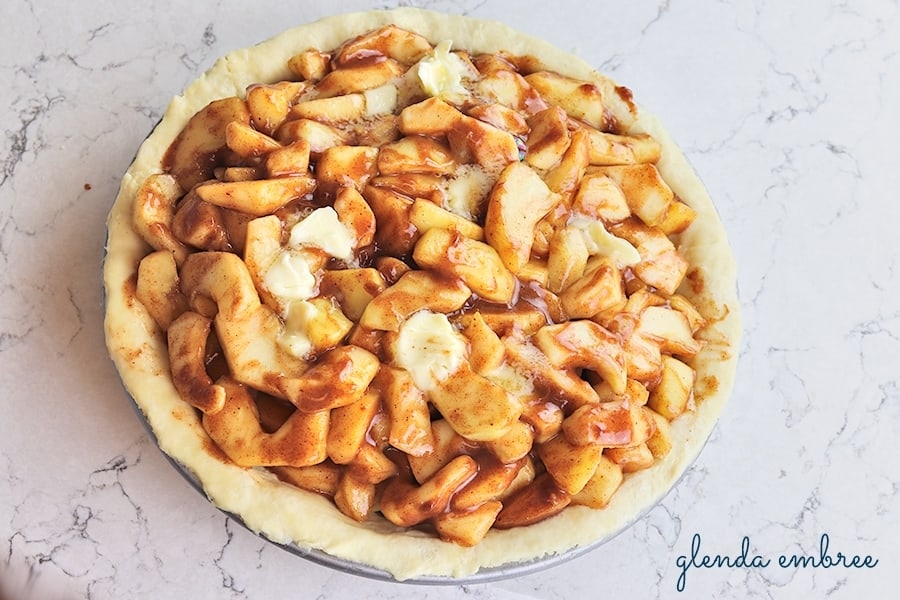
Be sure to gently press the apples down, across the entire surface of the pie, so you don’t leave large air pockets with no filling. You want a nice even layer of filling that will support the crust well.
Once the apples are pressed, evenly, dot the 2 Tablespoons of butter around the top of the filling, in small pats.
Add the Top Crust
Roll the top pie crust of your homemade apple pie, exactly like you did the bottom. Be sure to roll it out to the full 13″, this time. You will want it to hang below the edge of your bottom crust.
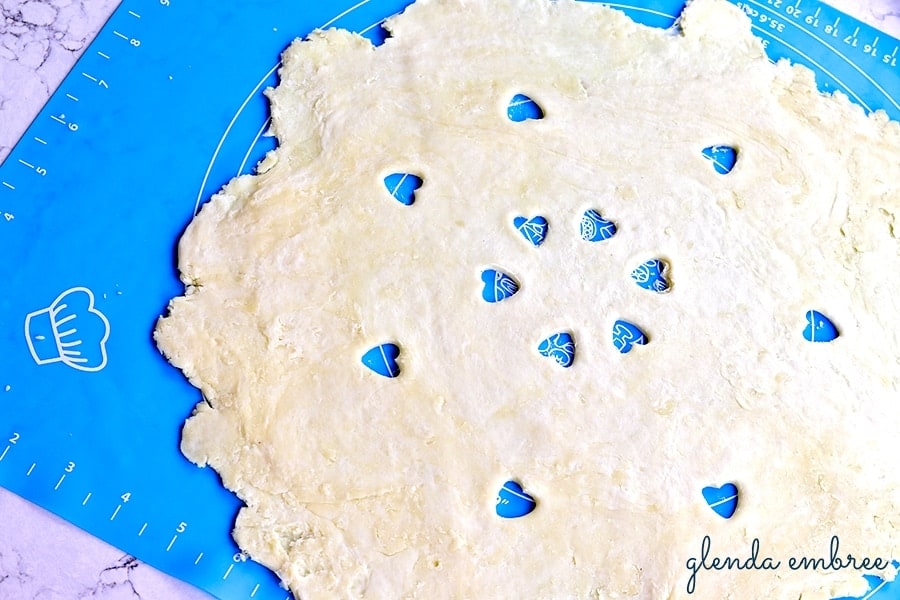
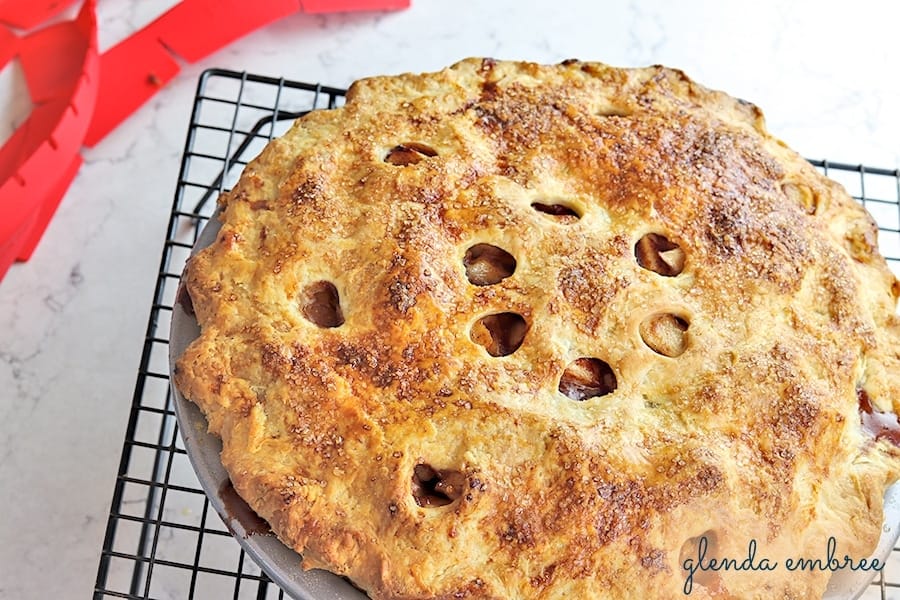
If you plan to cut decorations in your top piecrust, do that before transferring it to the pie. I used a small heart cutter to cut decorative vents in the top. Decorations are definitely not necessary.
Transfer the top crust to your pie, just as you did the bottom crust. Be careful to center it over the filling. The top crust should hang about 1″ below the edge of your pie plate. Just trim away any excess.
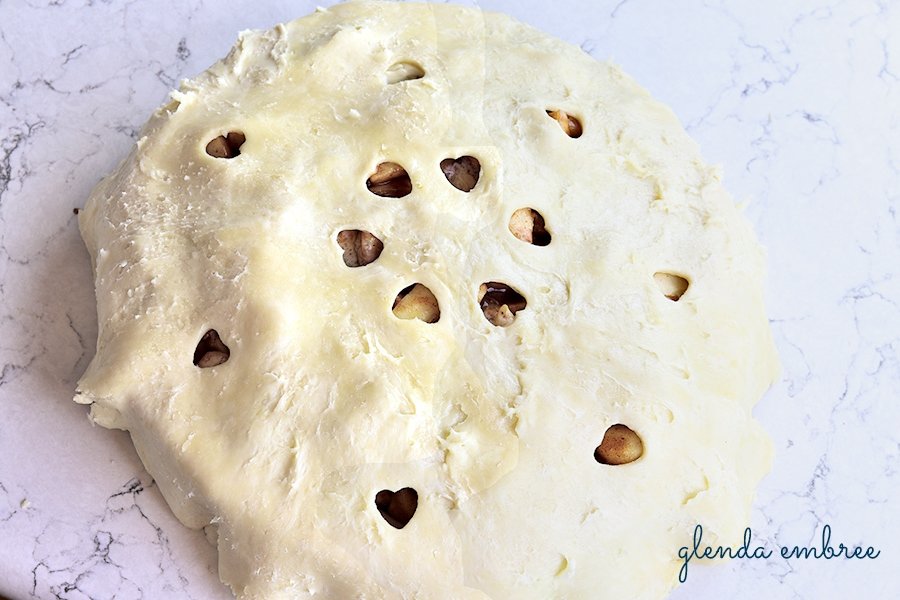
Your pie crust may look a little rough at this point. The edges are uneven and the butter is starting to soften and make things a little shaggy. Don’t panic. You’re almost done and I promise you’re going to “pretty it up”. The key is to work as quickly as you can, so that butter doesn’t completely melt.
Start folding the edge of your top crust under. It should actually fold underneath the edge of the bottom crust. Press them together gently to get a good seal. Work your way around the entire circumference of the pie, folding and sealing as you go.
Finishing Touches: Crimping the Crust
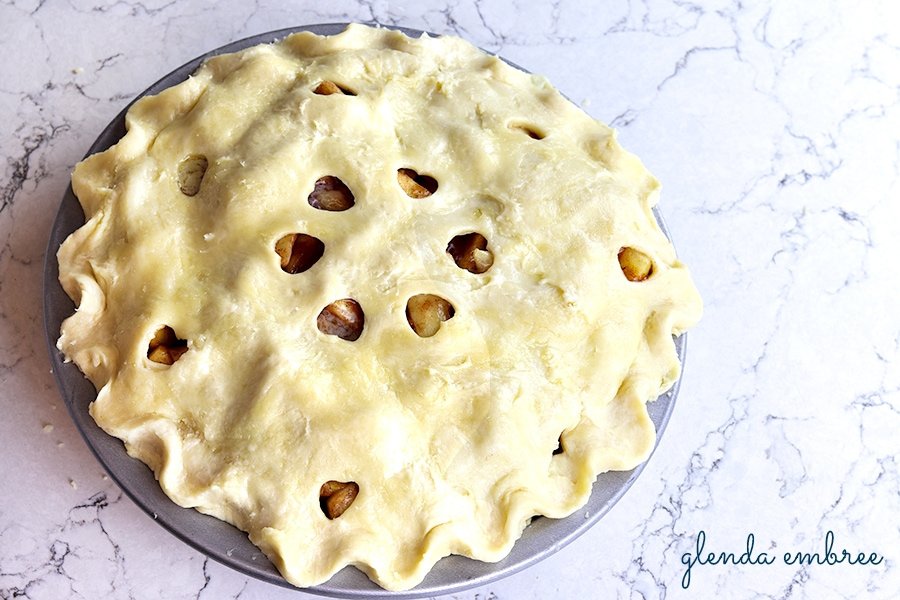
Once you have created a smooth rounded edge around the whole pie, you can decorate the edge as you like. Some people use the tines of a fork to create a decorative edge. I like the simple crimping method.
I place the forefinger and middle finger of my left hand on the edge of the crust, in a v-shape. Next, I use the forefinger of my right hand to gently pull the pie crust upward between the two fingers of my left hand. It leaves a small crimp in the edge. Then I move over next to the crimp I just created and repeat the process, working around the full edge of the homemade apple pie.
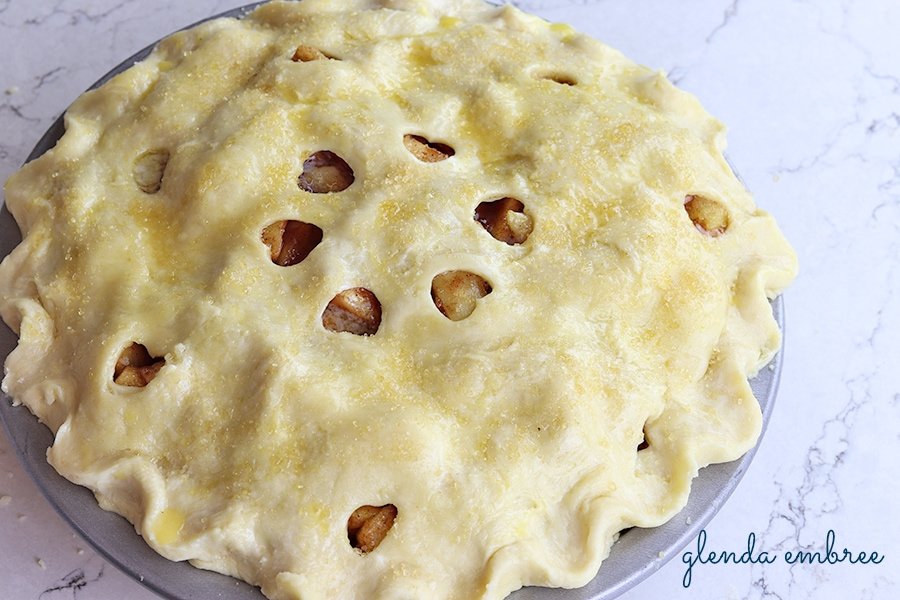
If you didn’t cut any decorative vents in the top crust, now is the time to use the tip of a knife and cut 4 small slits somewhere near the center of the top of the pie. Venting allows the steam to escape, which means your crust will be crispier.
Finishing Touches: Egg Wash & Sugar
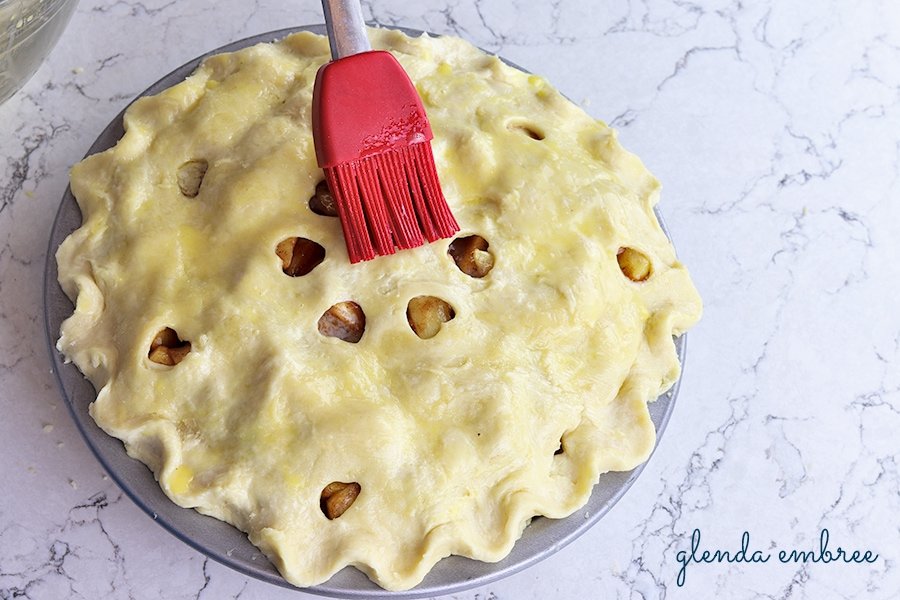
Beat the egg in a bowl until the yolk and egg are fully combined. Use a pastry brush to brush a light coating of the egg across the entire top of the pie.
Finish the crust preparation with a sprinkling of coarse sugar. This not only adds a slight sweetness, but will caramelize in the oven adding even more of a crunch to the texture of the top crust. It’s a simple, but tasty detail!
Baking Your Homemade Apple Pie
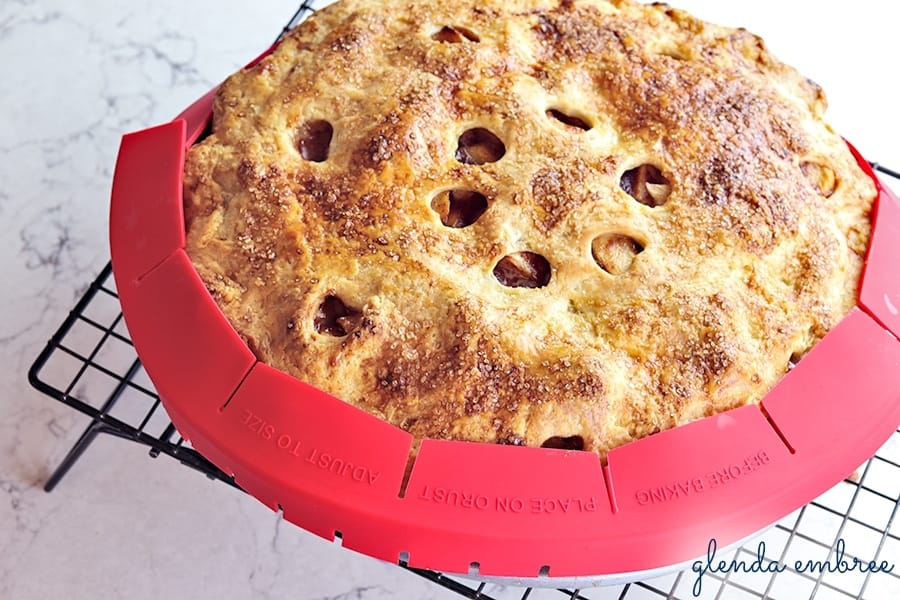
Now your pie is ready to bake. Place it into the preheated oven and set your timer for 20 or 25 minutes. It’s at this point that you will notice the edges of the crust are browning really well. However, by the time the pie bakes for another 20 to 25 minutes, the edges of the crust can get too dark.
You can use foil to cover the edges of your crust at this stage. I prefer to use adjustable *silicone pie crust shields, though. They are easy to add to the pan and instantly adjust to the size I need. I forgot to take a photo of them for you, until my pie was baked and out of the oven. But, at that 20-25 minute mark, in the baking time, is when you would apply them.
Continue baking the pie for the full 45 minutes. You may need an extra minute or two. Your apples should be tender and the crust golden brown and crisp. When you tap the crust, it shouldn’t feel soft in any spot. If it does, give it a couple more minutes of bake time. If everything is great, pull it out and allow it to cool fully on a wire rack.
Cool and Serve
The temptation will be to cut into your pie immediately, but I am begging you to hold off for just a bit. If you cut it now, the crust will crumble more easily and the filling will ooze out of the crust onto your serving plate.
If you want beautifully presented slices, exercise patience and serve your pie when it is fully cooled. This will literally take hours. It is so worth the wait, my friend. Serve your pie, as is, or with a scoop of homemade vanilla ice cream. Either way, whoever you baked this homemade apple pie for will be transported to dessert nirvana! You will be a rock star baker in their eyes.
You already are, in mine!
Hugs, my friend! Send me a picture of your beautiful pie!
The Recipe
Want to Save This Recipe?
Enter your email & I’ll send you the link so you always have it at your fingertips. Plus, I’ll send a collection of easy recipes to your inbox every Friday!
By submitting this form, you consent to receive emails from Glenda Embree.

Homemade Apple Pie
- Total Time: 2 hours
- Yield: 8–10 slices 1x
Description
The best buttery flaky crust and scrumptious apple filling. It’s a time investment, but this apple pie recipe is EASY and so delicious!
Ingredients
For the Crust:
- 2 1/2 cups all purpose flour
- 1 teaspoon salt
- 1 cup butter, (cold, cold, cold butter, cut into small cubes)
- 1/4 to 1/2 cup ice water
For the Apple Filling:
- 9–10 cups of apples; peeled, cored and sliced (between 6 & 7 lbs)
- 1/4 cup all-purpose flour
- 3/4 cup sugar
- 1 Tablespoon cinnamon
- 1/4 teaspoon nutmeg
- 2 Tablespoons lemon juice
For Finishing the Pie:
- 2 Tablespoons of butter
- 1 egg, beaten
- 2 tablespoons coarse sugar (I use turbinado sugar, but decorative sanding sugar would work, too.)
Instructions
For the Crust:
- Start by grabbing two sticks, (1 cup), of butter from the fridge. This butter needs to be 100% cold. Soft butter will not work. Open each cold stick of butter and cut it into thirds, lengthwise. That will leave three, long, skinny “planks”. Turn the stack of planks one quarter turn onto the uncut side, and cut it, again, into thirds the long way. Now, you have 9 long sticks. Start at one end of the stack of sticks and begin cutting off small cubes. Continue until all the butter is in cubes. Put the cubes into a bowl and set it back in the fridge.
- Prep a glass of ice water and grab a liquid measuring cup. Put them on the counter close to where you’ll be working.
- Add the flour and salt to a mixing bowl and stir them together.
- Grab the cubed butter from the fridge and dump all the cubes into the flour. From this point you are remembering TWO things: 1. Work quickly so the butter stays cold. 2. Don’t over-mix, so the crust won’t be tough.
- Using your hands, work the butter into the flour. Some of the cubes will get flattened between your fingers. Others will stay about pea-sized. That’s actually what you want. You’re not so much mixing the butter and flour into one homogenous unit. You’re actually being sure all the butter is coated in flour and distributed evenly through the entire bowl of flour.
- Measure out 1/4 cup of the ice water and very gently, with your hands, start mixing it into the flour/butter mixture. In the summer, with all it’s humidity, that 1/4 cup may be all you need to pull the dough together. But, in the dry, heated air of winter, you will probably need to add the rest. I even used 1 Tablespoon more, today, to get mine to come together.
- You will know you have added enough water when the shaggy dough can be picked up in your hand and stays together in a clump when you give it a gentle squeeze. This is not going to be a pretty, perfectly smooth ball of dough. We’re working with it very minimally to preserve the structure of the butter and to promote a tender crust.
- Take the shaggy ball of dough and divide it in half.
- Place each half on a sheet of plastic wrap and flatten into a 4- or 5- inch disk. Wrap the plastic wrap around each disk and place in the refrigerator for 30 minutes. Cold is your friend in this process.
- While the dough is chilling, make your apple filling.
For the Filling:
- Peel, core and slice 9-10 cups of apples.
- Place the apple slices into a large stock pot or sauce pan and sprinkle with the flour, sugar, cinnamon, nutmeg and lemon juice.
- Stir to coat all the apples and then begin heating them over medium-low heat, on your stove. You’ll want to cook them until the mixture is slightly reduced in volume and the apples are just beginning to soften, slightly. A thick, smooth glaze will have formed around the apples. The process will take around 15 minutes. You’ll want to give the apples a good stir several times, throughout. (If you like your pie apples super soft, you can cook them for a little longer, but remember they will also have 45 minutes in the oven. We don’t like mushy apples and so lean more toward the tender-crisp texture, as our preference.)
- After the apples are done cooking, take them off the burner and set them aside, while you prepare the crusts.
To Assemble the Pie for Baking:
- Preheat the oven to 425°.
- Lightly spray a 9″ deep-dish pie pan with cooking oil.
- Remove one dough disc from the fridge and roll it out to a diameter of 12″-13″. Work from the center of the dish, rolling outward to the edges. Turn the pin, a quarter turn to roll from the center out to another edge. Work your way around the disc until it is rolled to a uniform thickness.
- Transfer the rolled pie crust to your prepared pan, centering it evenly. Trim the excess dough from the edges, leaving about 1/4″ of overhang past the rim, all the way around.
- Dump the prepared apple filling into the crust. Press down, gently, so that each slice of pie will be properly filled and not have air pockets.
- Dot bits of the butter all around the top of the apples.
- Roll out the second disc of pie dough, just like the first. This is the point to cut any decorations if you are planning them. I used a small heart cutter to decorate my top crust for Valentines Day. You could also cut the dough into strips and make a woven top if you like.
- Once you have finished preparing your top crust, transfer it to your pie, centering it over the filling.
- Trim the edges, leaving a 1″ overhang.
- Roll the top crust edge, under the bottom crust edge, pinching to seal, all the way around your pie.
- Go back and crimp with your fingers to make a decorative edge around the pie. Or you can use a fork, to imprint a design around the edge.
- If you did not cut any designs in your top crust before placing it over the apples, use the tip of a sharp knife and cut 4 small slits at the center of the pie to vent steam. If you did cut designs, those open areas will be the vent.
- Beat the egg vigorously. Then use a pastry brush to brush the beaten egg over the surface of your beautiful pie.
- Sprinkle the coarse sugar over the entire surface.
- Bake at 425° for 45 minutes or until the apples are tender.
Notes
I usually check my pie about 20-35 minutes in. If it seems like the crust will get to dark, before the pie is done, I put a crust shield on it. You could do the same thing with a bit of foil, if you don’t have a silicone shield. I just love the ease of the adjustable silicone shields.
- Prep Time: 1 hour
- Cook Time: 1 hour
- Category: Dessert, Pastry, Pie
- Method: Baking
- Cuisine: American
More Dessert Recipes for You to Try
Not quite ready for making your own pie crust, yet? Check out this delicious Depression Era Water Pie recipe from Sherrie, over at Cook Like A Master!
Another perfect Fall apple dessert! You have to try Heidi’s Apple Coffee Cake! It’s as beautiful as it is delicious!
You can’t go wrong with this delicious Cranberry Custard Pie! It’s a scrumptious Fall and Winter dessert that will be a welcome addition to any holiday table. Plus, it’s vegetarian.
You’ll love this Honey Cake from Robin at All Ways Delicious. It’s perfect for Rosh Hashanah or any time a moist, tender cake with sweet honey flavor fits the menu. So delicious!
Check out this scrumptious Pecan Pie from Little House Big Alaska. Laura will have your mouth watering with this fabulous pie!
A beautiful and delicious Nutella Strawberry Grilled Pound Cake Sandwich, from Paula, at Call Me PMc are going to be a new favorite dessert!
Love pie but don’t need a whole one? Try this Single Serve Apple Pie from Lisa at Little Bit Recipes.
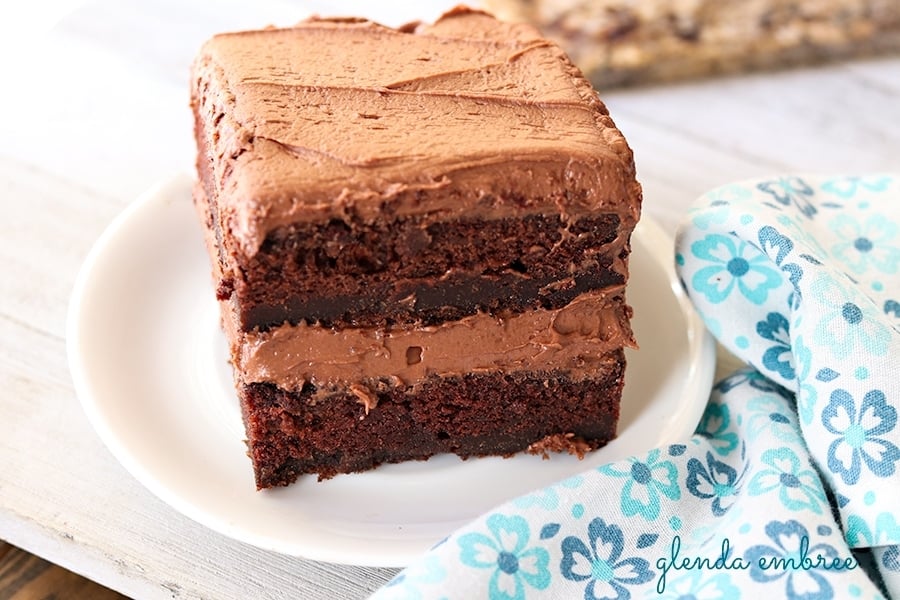
Family Favorite Chocolate Cake
Soft Chewy Ginger Cookies


About Glenda
I believe cooking from scratch doesn’t have to be complicated and that YOU can do it. My simple recipes, tutorials, and cooking tips will help you get weeknight dinners on the table with less stress. Forget takeout or the drive-thru. Let me show you how to make homemade easy. Read more...


Probably the prettiest pie I have ever seen and I am 70 years old!
Thank you, Nancy! You made my day!
You make this look so easy I had to try… and it came out awesome! Delicious and comforting.
I’m so glad, Shelby! Thank you!
What a delicious Apple Pie. Just like my grandma used to make. I will definitely print this recipe and give it a try. Can’t wait.
This apple pie has a perfect crust, and of course that luscious apple filling. It was delicious. Thanks for sharing. Will be making this again and again.
Thanks, so much, Michele! I’m happy that you enjoyed it.
This is truly a work of art. Thank you for sharing!
Thanks, Michele! I hope you get a chance to make it.
This is truly a work of art. Thank you for sharing!
This pie is perfect–delicious filling and flaky buttery crust. Yum!
Thank you, Robin! Have a great weekend!
i know apples aren’t in season right now in my area, but I can’t wait to make this when I head home with a bushel from my favorite orchard. this looks amazing.
Heather, it’s definitely an excellent apple pie. I can’t wait for you to try it!